
Using drop-down lists in Excel can greatly enhance the user experience and reduce errors when working with forms or data entry. Here's a comprehensive guide on how to add a drop-down list in Excel for Yes/No options.
Why Use Drop-Down Lists in Excel?

Drop-down lists are an excellent way to restrict user input to a specific set of options, making it easier to maintain data consistency and accuracy. By using drop-down lists, you can:
- Reduce errors caused by manual data entry
- Improve data quality and consistency
- Enhance user experience by providing clear options
- Simplify data analysis and reporting
How to Create a Drop-Down List in Excel
Creating a drop-down list in Excel is a straightforward process. Here's a step-by-step guide:
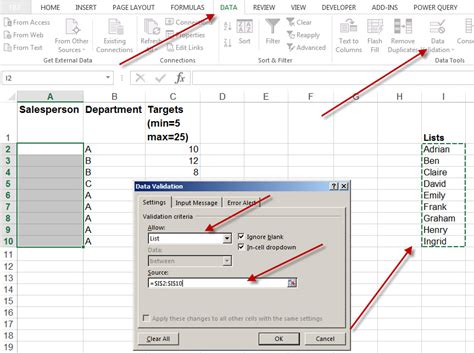
Method 1: Using the Data Validation Tool
- Select the cell where you want to create the drop-down list.
- Go to the "Data" tab in the ribbon.
- Click on "Data Validation" in the "Data Tools" group.
- In the "Data Validation" dialog box, select "List" from the "Allow" dropdown menu.
- In the "Source" field, enter the options you want to display in the drop-down list, separated by commas. For a Yes/No option, you can enter "Yes,No" or "Y,N".
- Click "OK" to create the drop-down list.
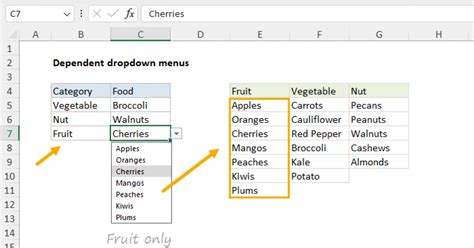
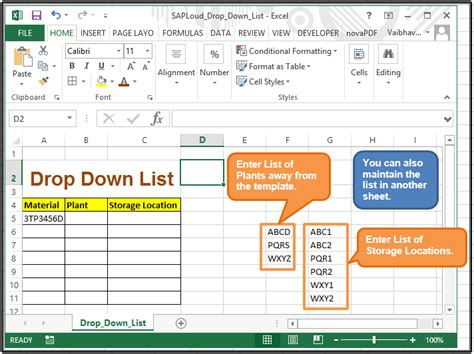
Method 2: Using a Named Range
- Create a named range for the options you want to display in the drop-down list. For example, you can create a named range called "YesNoOptions" with the values "Yes" and "No".
- Select the cell where you want to create the drop-down list.
- Go to the "Data" tab in the ribbon.
- Click on "Data Validation" in the "Data Tools" group.
- In the "Data Validation" dialog box, select "List" from the "Allow" dropdown menu.
- In the "Source" field, enter the named range you created in step 1, preceded by an equal sign (=). For example, "=YesNoOptions".
- Click "OK" to create the drop-down list.

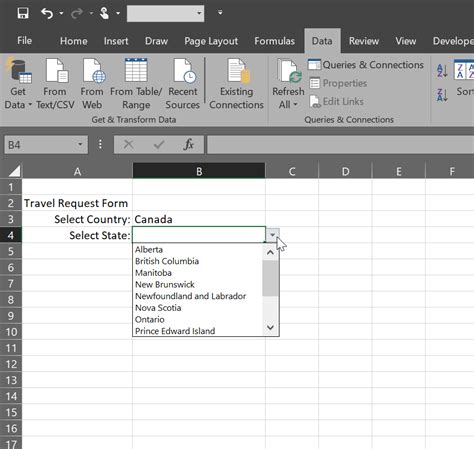
Using the Drop-Down List
Once you've created the drop-down list, you can use it to select an option from the list. To do this:
- Click on the cell containing the drop-down list.
- Click on the drop-down arrow to display the list of options.
- Select an option from the list.

Benefits of Using Drop-Down Lists in Excel
Using drop-down lists in Excel offers several benefits, including:
- Improved data quality and consistency
- Reduced errors caused by manual data entry
- Enhanced user experience
- Simplified data analysis and reporting
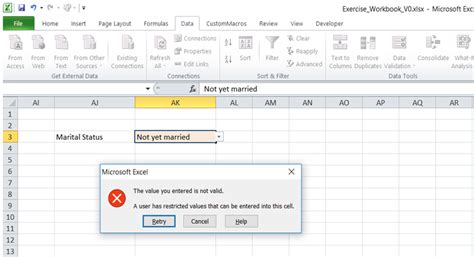
Common Errors When Creating Drop-Down Lists in Excel
When creating drop-down lists in Excel, you may encounter some common errors. Here are a few troubleshooting tips:
- Make sure the options are separated by commas in the "Source" field.
- Ensure the named range is correctly defined and referenced in the "Source" field.
- Check that the drop-down list is not conflicting with other data validation rules in the same cell.
Gallery of Drop-Down List Options in Excel
Excel Drop-Down List Options


Conclusion
Adding a drop-down list in Excel can greatly enhance the user experience and improve data quality. By following the steps outlined in this article, you can create a drop-down list for Yes/No options and take advantage of the benefits it offers. Remember to troubleshoot common errors and explore the various options available in Excel to get the most out of your drop-down lists.
We hope this article has been helpful in teaching you how to add a drop-down list in Excel for Yes/No options. If you have any further questions or need additional guidance, please don't hesitate to ask. Share your experiences and tips for working with drop-down lists in Excel in the comments section below!