
Unlock the full potential of your Aimpoint Carbine Optic with our expert guide. Discover 7 effective ways to use this cutting-edge red dot sight for enhanced accuracy and speed. Master techniques for faster target acquisition, optimal brightness settings, and seamless rifle transitions to dominate on the battlefield or range.
Using a red dot sight on your rifle can greatly improve your shooting accuracy and speed. One popular option is the Aimpoint Carbine Optic (ACO), a compact and durable sight designed for modern sporting rifles. To get the most out of your Aimpoint ACO, here are seven ways to use it effectively.
Understanding the Basics

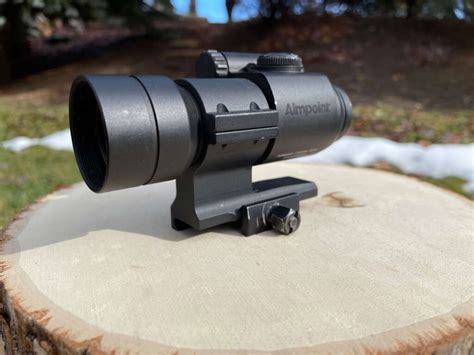
Before diving into advanced techniques, it's essential to understand the basics of the Aimpoint ACO. This sight uses a red dot reticle, which is projected onto a lens, allowing you to aim quickly and accurately. The ACO is designed for close-quarters combat and is ideal for use on modern sporting rifles.
Zeroing Your Aimpoint ACO
To use your Aimpoint ACO effectively, you need to zero it properly. Zeroing involves adjusting the sight so that the red dot aligns with the point of impact. To zero your ACO, follow these steps:
- Start by setting up a target at a known distance (typically 25 yards).
- Fire a shot and note the point of impact.
- Adjust the windage and elevation controls on the ACO to move the red dot to the point of impact.
- Fire another shot to confirm the zero.
Proper Mounting Techniques

Proper mounting of your Aimpoint ACO is crucial for effective use. Here are some tips to keep in mind:
- Make sure the ACO is securely mounted to your rifle using a high-quality mount.
- Ensure the ACO is properly aligned with the rifle's bore.
- Use a torque wrench to tighten the mounting screws to the recommended specification.
Adjusting for Parallax Error
Parallax error occurs when the red dot appears to shift when you move your head or eye position. To adjust for parallax error:
- Look through the ACO and move your head or eye position.
- If the red dot appears to shift, adjust the windage and elevation controls to align the red dot with the point of aim.
- Repeat this process until the red dot remains stationary.
Using the Aimpoint ACO in Various Lighting Conditions
The Aimpoint ACO is designed to work in various lighting conditions, from bright sunlight to low-light environments. Here are some tips for using the ACO in different lighting conditions:
- In bright sunlight, adjust the brightness setting to the highest level to ensure the red dot is visible.
- In low-light environments, adjust the brightness setting to the lowest level to conserve battery life and reduce glare.
- In dawn or dusk conditions, adjust the brightness setting to a medium level to balance visibility and battery life.
Using the Aimpoint ACO with Night Vision Devices
The Aimpoint ACO is compatible with night vision devices (NVDs), allowing you to use the sight in low-light environments. To use the ACO with an NVD:
- Adjust the brightness setting to the lowest level to avoid damaging the NVD.
- Use the NVD's built-in gain control to adjust the brightness of the image.
Maintenance and Troubleshooting

Regular maintenance is essential to ensure the Aimpoint ACO functions properly. Here are some tips for maintaining and troubleshooting the ACO:
- Clean the lens and exterior regularly to ensure clear visibility.
- Check the battery life regularly and replace the battery as needed.
- If the red dot appears dim or distorted, check the brightness setting and adjust as needed.
Common Issues and Solutions
Here are some common issues and solutions for the Aimpoint ACO:
- Issue: Red dot appears dim or distorted. Solution: Check the brightness setting and adjust as needed. Clean the lens and exterior to ensure clear visibility.
- Issue: Red dot appears to shift when moving head or eye position. Solution: Adjust for parallax error by adjusting the windage and elevation controls.
Training and Practice

To get the most out of your Aimpoint ACO, regular training and practice are essential. Here are some tips for training and practicing with the ACO:
- Practice aiming and shooting at various distances and angles.
- Use drills such as the "dot drill" to improve accuracy and speed.
- Practice using the ACO in various lighting conditions to get a feel for how it performs.
Tips for Improving Accuracy and Speed
Here are some tips for improving accuracy and speed when using the Aimpoint ACO:
- Focus on the target and use the red dot as a reference point.
- Use a consistent aiming technique, such as the "dot drill".
- Practice regularly to develop muscle memory and improve accuracy and speed.
Conclusion

In conclusion, the Aimpoint Carbine Optic is a versatile and effective sight that can improve your shooting accuracy and speed. By following the tips outlined in this article, you can get the most out of your ACO and take your shooting skills to the next level. Remember to always practice regularly and maintain your ACO to ensure optimal performance.
Aimpoint Carbine Optic Image Gallery


We hope this article has been informative and helpful in getting the most out of your Aimpoint Carbine Optic. Remember to always practice regularly and maintain your ACO to ensure optimal performance. If you have any questions or comments, please feel free to share them below.