
Intro
Master the art of maintaining your Glock 19 with our comprehensive, step-by-step cleaning guide. Learn how to disassemble, inspect, and clean your pistols critical components, ensuring optimal performance and longevity. Discover essential techniques for removing grime, lubricating moving parts, and reassembling with ease, plus expert tips for Glock maintenance and upkeep.
Cleaning your Glock 19 is an essential part of maintaining its performance, reliability, and longevity. A dirty gun can lead to malfunctions, accuracy issues, and even safety hazards. In this article, we'll provide a comprehensive, step-by-step guide on how to clean your Glock 19, ensuring it remains in top condition.
The importance of regular cleaning cannot be overstated. Glock pistols, in particular, are known for their reliability and durability, but they still require regular maintenance to function optimally. By following this guide, you'll be able to keep your Glock 19 in pristine condition, ensuring it continues to serve you well for years to come.
Before we dive into the cleaning process, it's essential to note that you should always follow proper safety protocols when handling firearms. Make sure you're in a safe environment, free from distractions, and always keep the muzzle pointed in a safe direction.
Disassembly and Preparation
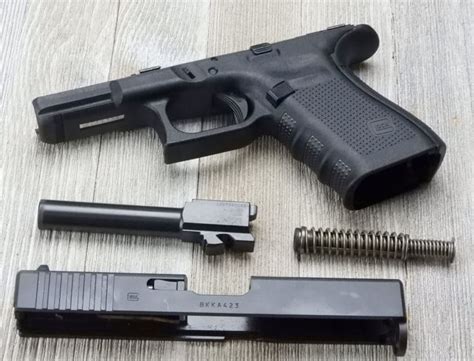
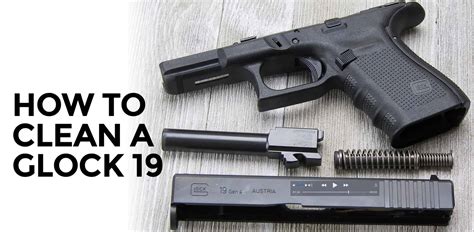
To begin the cleaning process, you'll need to disassemble your Glock 19. This will give you access to the internal components, allowing you to clean and inspect them properly.
- Ensure the pistol is unloaded by removing the magazine and checking the chamber.
- Pull the slide back and lock it in place using the slide stop.
- Release the slide by pushing the slide stop down, and then pull the slide forward, off the frame.
- Remove the barrel and recoil spring from the slide.
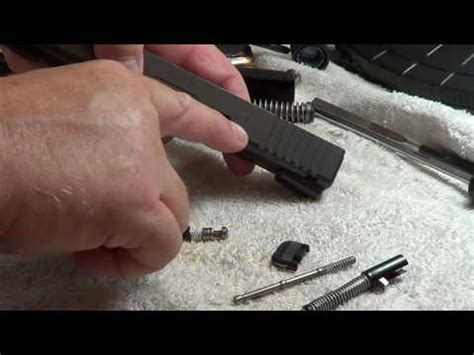
- Remove the firing pin and extractor from the slide.
Cleaning the Barrel

The barrel is one of the most critical components of your Glock 19, and it requires regular cleaning to maintain accuracy and performance.
- Use a bore brush to scrub the barrel, removing any debris or residue.
- Apply a small amount of gun cleaning solvent to the barrel, making sure to cover the entire surface.
- Let the solvent sit for a few minutes to allow it to penetrate and loosen any grime.
- Use a cleaning rod to push a patch through the barrel, removing any debris or solvent.
- Repeat the process until the patch comes out clean.
Cleaning the Slide and Frame

The slide and frame are also critical components that require regular cleaning.
- Use a soft-bristled brush to remove any debris or residue from the slide and frame.
- Apply a small amount of gun cleaning solvent to the slide and frame, making sure to cover the entire surface.
- Let the solvent sit for a few minutes to allow it to penetrate and loosen any grime.
- Use a cleaning cloth to wipe down the slide and frame, removing any debris or solvent.
- Repeat the process until the cloth comes out clean.
Cleaning the Firing Pin and Extractor
The firing pin and extractor are critical components that require regular cleaning to maintain reliability.
- Use a small brush to remove any debris or residue from the firing pin and extractor.
- Apply a small amount of gun cleaning solvent to the firing pin and extractor, making sure to cover the entire surface.
- Let the solvent sit for a few minutes to allow it to penetrate and loosen any grime.
- Use a cleaning cloth to wipe down the firing pin and extractor, removing any debris or solvent.
- Repeat the process until the cloth comes out clean.
Reassembly and Inspection

Once you've completed the cleaning process, it's time to reassemble your Glock 19.
- Reinstall the firing pin and extractor into the slide.
- Reinstall the barrel and recoil spring into the slide.
- Slide the slide back onto the frame, making sure it's properly aligned.
- Pull the slide back and lock it in place using the slide stop.
- Inspect the pistol to ensure everything is properly aligned and functioning correctly.
Final Inspection and Maintenance

The final step is to inspect your Glock 19 to ensure everything is in working order.
- Check the pistol for any signs of wear or damage.
- Apply a small amount of gun oil to the moving parts to keep them lubricated.
- Store the pistol in a safe and secure location, away from children and unauthorized individuals.
Glock 19 Cleaning Gallery


By following this comprehensive guide, you'll be able to keep your Glock 19 in top condition, ensuring it continues to serve you well for years to come. Remember to always follow proper safety protocols when handling firearms, and happy cleaning!