
Creating a distribution curve in Excel is a valuable skill for data analysts, as it enables them to visualize and understand the distribution of their data. A distribution curve, also known as a probability distribution, is a graphical representation of the probability of different values or ranges of values that a random variable can take. In this article, we will explore five ways to create a distribution curve in Excel.
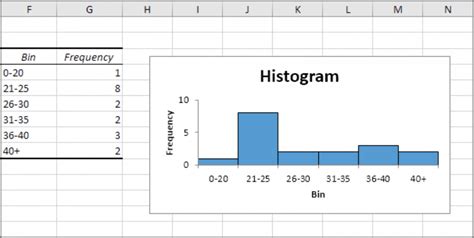
Method 1: Using the Histogram Tool
One of the easiest ways to create a distribution curve in Excel is by using the built-in Histogram tool. This tool allows you to create a histogram, which is a graphical representation of the distribution of your data.
Step-by-Step Instructions:
- Select the data range that you want to create a histogram for.
- Go to the "Data" tab in the ribbon.
- Click on the "Data Analysis" button in the "Analysis" group.
- Select "Histogram" from the drop-down menu.
- In the "Histogram" dialog box, select the input range and the bin range.
- Click "OK" to create the histogram.
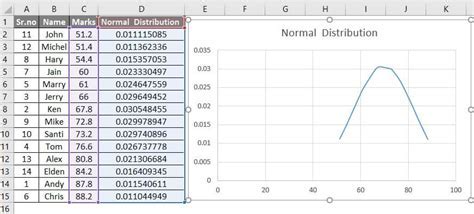
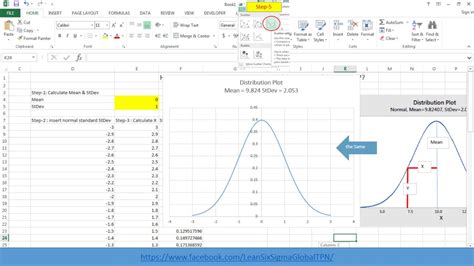
Method 2: Using the Normal Distribution Function
If you want to create a distribution curve for a normal distribution, you can use the Normal Distribution function in Excel. This function returns the probability density function (PDF) of a normal distribution.
Step-by-Step Instructions:
- Select the cell where you want to display the distribution curve.
- Type "=NORM.DIST(x, mean, standard_dev, cumulative)" and press Enter.
- Replace "x" with the value for which you want to calculate the probability.
- Replace "mean" and "standard_dev" with the mean and standard deviation of the distribution.
- Set "cumulative" to FALSE to return the probability density function (PDF).
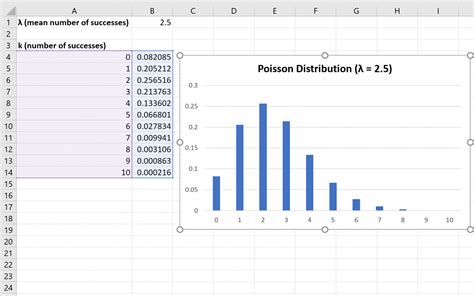
Method 3: Using the Poisson Distribution Function
If you want to create a distribution curve for a Poisson distribution, you can use the Poisson Distribution function in Excel. This function returns the probability mass function (PMF) of a Poisson distribution.
Step-by-Step Instructions:
- Select the cell where you want to display the distribution curve.
- Type "=POISSON.DIST(x, mean, cumulative)" and press Enter.
- Replace "x" with the value for which you want to calculate the probability.
- Replace "mean" with the mean of the distribution.
- Set "cumulative" to FALSE to return the probability mass function (PMF).
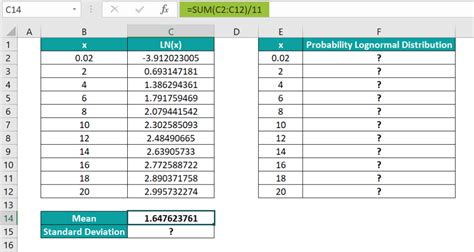
Method 4: Using the Lognormal Distribution Function
If you want to create a distribution curve for a lognormal distribution, you can use the Lognormal Distribution function in Excel. This function returns the probability density function (PDF) of a lognormal distribution.
Step-by-Step Instructions:
- Select the cell where you want to display the distribution curve.
- Type "=LOGNORM.DIST(x, mean, standard_dev, cumulative)" and press Enter.
- Replace "x" with the value for which you want to calculate the probability.
- Replace "mean" and "standard_dev" with the mean and standard deviation of the distribution.
- Set "cumulative" to FALSE to return the probability density function (PDF).
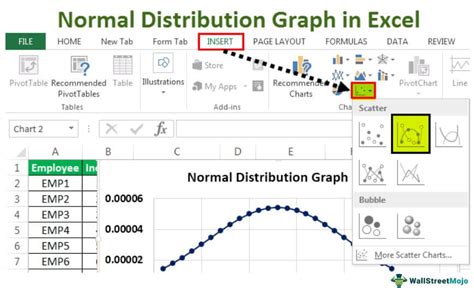
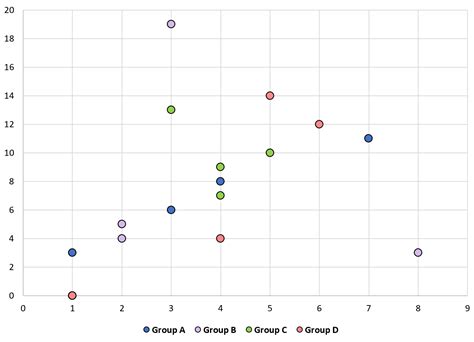
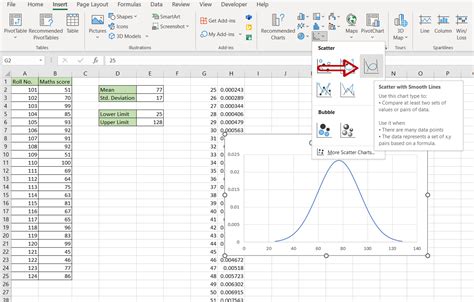
Method 5: Using a Scatter Plot
Finally, you can create a distribution curve in Excel by using a scatter plot. This method requires you to have a dataset with two columns: one for the values and one for the corresponding probabilities.
Step-by-Step Instructions:
- Select the data range that you want to create a scatter plot for.
- Go to the "Insert" tab in the ribbon.
- Click on the "Scatter" button in the "Charts" group.
- Select "Scatter" from the drop-down menu.
- In the "Scatter" dialog box, select the data range and the chart title.
- Click "OK" to create the scatter plot.
Distribution Curve in Excel Image Gallery


In conclusion, creating a distribution curve in Excel can be done using various methods, each with its own strengths and weaknesses. By understanding the different methods available, you can choose the one that best suits your needs and create a distribution curve that accurately represents your data.