
In today's fast-paced world, managing dates and deadlines is crucial for individuals and organizations alike. Microsoft Excel, being a powerful tool for data management, offers various ways to auto-populate dates, making it easier to work with dates and deadlines. In this article, we will explore five ways to auto-populate dates in Excel, helping you to streamline your workflow and increase productivity.
Understanding the Importance of Auto-Populating Dates
Auto-populating dates in Excel can save you a significant amount of time and effort, especially when working with large datasets. It eliminates the need to manually enter dates, reducing the risk of errors and inconsistencies. Moreover, auto-populating dates enables you to focus on more critical tasks, such as data analysis and decision-making.
Method 1: Using the AutoFill Feature
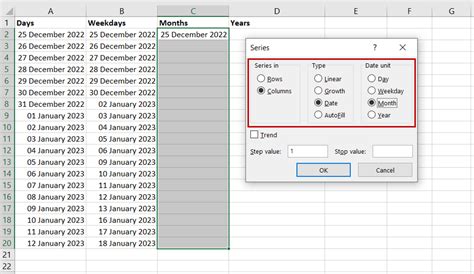
One of the simplest ways to auto-populate dates in Excel is by using the AutoFill feature. This feature allows you to fill a range of cells with a sequence of dates, based on a starting date and a specified interval.
To use the AutoFill feature, follow these steps:
- Select the cell that contains the starting date.
- Go to the "Home" tab in the Excel ribbon.
- Click on the "Fill" button in the "Editing" group.
- Select "Series" from the drop-down menu.
- In the "Series" dialog box, select "Date" as the series type.
- Choose the desired date interval (e.g., daily, weekly, monthly).
- Click "OK" to apply the changes.
Method 2: Using the Fill Handle
Another way to auto-populate dates in Excel is by using the Fill Handle. This feature allows you to quickly fill a range of cells with a sequence of dates, based on a starting date and a specified interval.
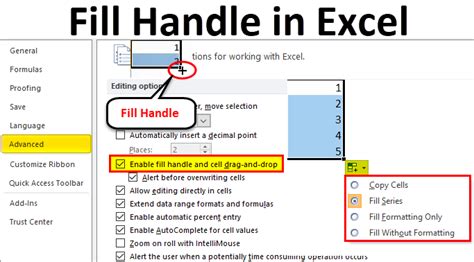
To use the Fill Handle, follow these steps:
- Select the cell that contains the starting date.
- Move the cursor to the bottom-right corner of the cell, until you see a small square (the Fill Handle).
- Click and drag the Fill Handle down to the desired range of cells.
- Release the mouse button to apply the changes.
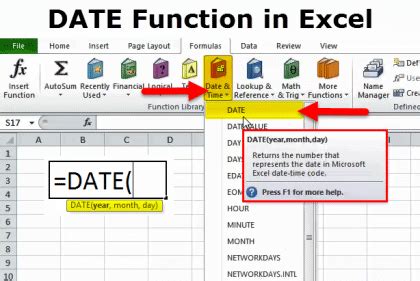
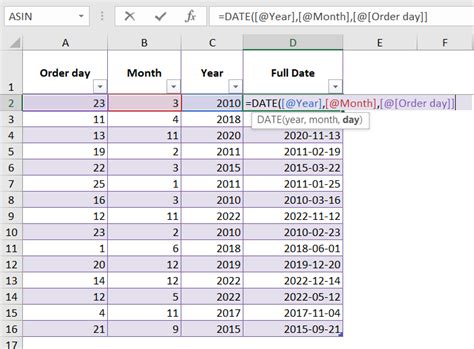
Method 3: Using the Date Function
The Date function in Excel allows you to create a date based on a year, month, and day. You can use this function to auto-populate dates in a range of cells.

To use the Date function, follow these steps:
- Select the cell where you want to create the date.
- Type "=DATE(year, month, day)" and press Enter.
- Replace "year", "month", and "day" with the desired values.
For example, to create a date for January 1, 2022, you would type "=DATE(2022, 1, 1)".
Method 4: Using the TODAY Function
The TODAY function in Excel returns the current date. You can use this function to auto-populate dates in a range of cells, based on the current date.
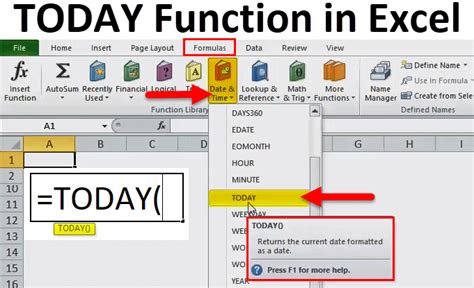
To use the TODAY function, follow these steps:
- Select the cell where you want to create the date.
- Type "=TODAY()" and press Enter.
The TODAY function will return the current date.
Method 5: Using a Formula with the WORKDAY Function
The WORKDAY function in Excel returns a date that is a specified number of workdays before or after a date. You can use this function to auto-populate dates in a range of cells, based on a starting date and a specified interval.
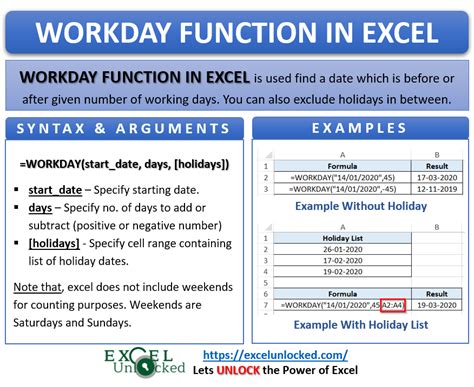
To use the WORKDAY function, follow these steps:
- Select the cell where you want to create the date.
- Type "=WORKDAY(start_date, days, [holidays])" and press Enter.
- Replace "start_date" with the desired starting date.
- Replace "days" with the desired number of workdays.
- Replace "[holidays]" with a range of cells that contains holidays (optional).
For example, to create a date that is 5 workdays after January 1, 2022, you would type "=WORKDAY(A1, 5)" (assuming the starting date is in cell A1).
Excel Dates Image Gallery
We hope this article has helped you to learn five ways to auto-populate dates in Excel. Whether you're using the AutoFill feature, the Fill Handle, or a formula with the WORKDAY function, auto-populating dates can save you time and effort in your workflow. Try out these methods and explore other Excel features to improve your productivity.