
As we navigate the complexities of data analysis and visualization, having the right tools at our disposal can make all the difference. One often-overlooked feature in Microsoft Excel is the calendar pop-up, which can greatly enhance user experience and simplify date-related tasks. In this article, we will delve into five different methods to create an Excel calendar pop-up, each with its unique benefits and applications.
Understanding the Importance of Calendar Pop-Ups in Excel

Before diving into the methods, it's essential to understand why calendar pop-ups are valuable in Excel. A calendar pop-up allows users to easily select dates by visually navigating through a calendar interface, rather than manually typing the date. This feature is particularly useful when working with date-related data, such as scheduling, planning, and tracking events.
Method 1: Using the DATE Picker Add-in
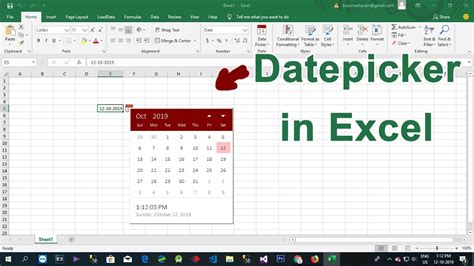
One of the most straightforward methods to create a calendar pop-up in Excel is by using the DATE Picker add-in. This add-in is available for download from the Microsoft Office website and can be easily installed and integrated into your Excel application.
To use the DATE Picker add-in:
- Go to the Microsoft Office website and download the DATE Picker add-in.
- Install the add-in and restart Excel.
- Select the cell where you want to insert the calendar pop-up.
- Go to the "Developer" tab and click on the "Insert" button.
- Select the "DATE Picker" control and click "OK."
- Configure the settings as desired.
Benefits of Using the DATE Picker Add-in
Using the DATE Picker add-in offers several benefits, including:
- Easy installation and integration
- Customizable settings
- Compatible with various Excel versions
However, it's essential to note that this method requires an add-in installation, which may not be feasible in all environments.
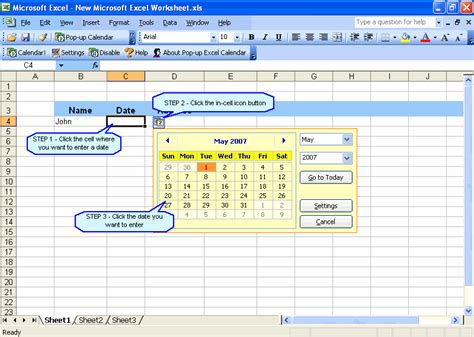
Method 2: Creating a Calendar Pop-up Using VBA
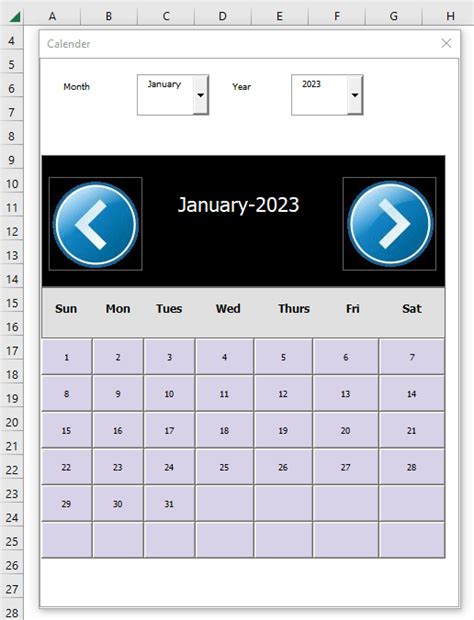
Another method to create a calendar pop-up in Excel is by using Visual Basic for Applications (VBA). This method requires some programming knowledge but offers a high degree of customization.
To create a calendar pop-up using VBA:
- Open the Visual Basic Editor by pressing "Alt + F11" or navigating to "Developer" > "Visual Basic."
- Create a new module and paste the following code:
Sub CalendarPopup()
    Dim calendar As Object
    Set calendar = CreateObject("CalendarCtl.Calendar")
    calendar.Visible = True
    calendar.DateTime = Now
    Set calendar = Nothing
End Sub
- Assign the macro to a button or shortcut.
Benefits of Using VBA
Using VBA to create a calendar pop-up offers several benefits, including:
- High degree of customization
- No add-in installation required
- Compatible with various Excel versions
However, this method requires some programming knowledge and may be time-consuming to implement.
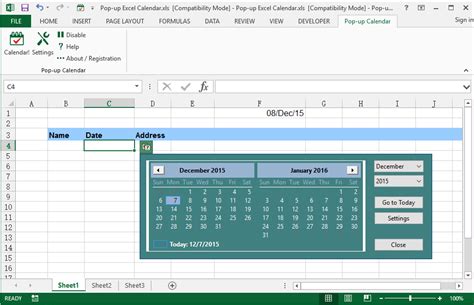
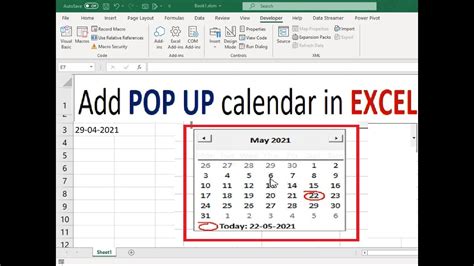
Method 3: Using a Third-Party Add-in
Another option is to use a third-party add-in specifically designed for creating calendar pop-ups in Excel. These add-ins often offer advanced features and customization options.
To use a third-party add-in:
- Research and select a reputable add-in provider.
- Download and install the add-in.
- Follow the provider's instructions for configuration and use.
Benefits of Using a Third-Party Add-in
Using a third-party add-in offers several benefits, including:
- Advanced features and customization options
- Easy installation and integration
- Often compatible with various Excel versions
However, this method may require a subscription or one-time payment, and compatibility issues may arise.
Method 4: Creating a Calendar Pop-up Using Conditional Formatting
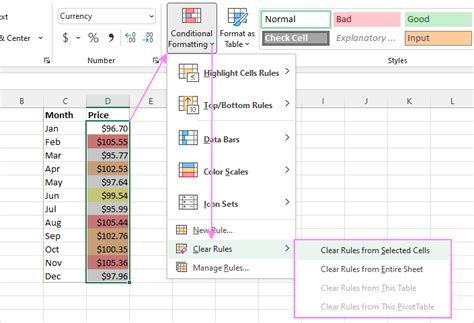
A lesser-known method to create a calendar pop-up in Excel is by using conditional formatting. This method requires some creativity but offers a unique solution.
To create a calendar pop-up using conditional formatting:
- Select the range of cells where you want to display the calendar.
- Go to the "Home" tab and click on the "Conditional Formatting" button.
- Select "New Rule" and choose "Use a formula to determine which cells to format."
- Enter the following formula:
=TODAY()-WEEKDAY(TODAY(),2)+1 - Format the cells as desired.
Benefits of Using Conditional Formatting
Using conditional formatting offers several benefits, including:
- No add-in installation required
- No programming knowledge needed
- Compatible with various Excel versions
However, this method has limitations, such as limited customization options and potential performance issues.
Method 5: Creating a Calendar Pop-up Using a PivotTable
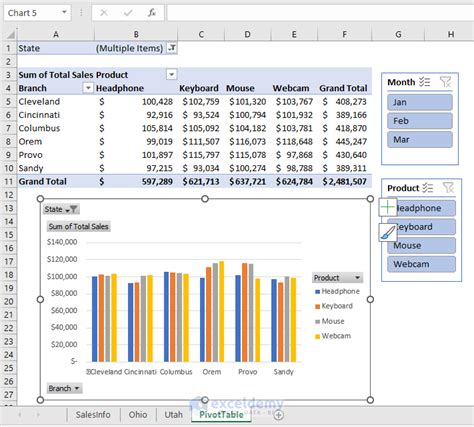
The final method to create a calendar pop-up in Excel is by using a PivotTable. This method requires some data manipulation but offers a unique solution.
To create a calendar pop-up using a PivotTable:
- Create a table with date-related data.
- Go to the "Insert" tab and click on the "PivotTable" button.
- Select the table range and click "OK."
- Configure the PivotTable settings as desired.
Benefits of Using a PivotTable
Using a PivotTable offers several benefits, including:
- No add-in installation required
- No programming knowledge needed
- Compatible with various Excel versions
However, this method has limitations, such as limited customization options and potential performance issues.
Gallery of Excel Calendar Pop-up Examples
Excel Calendar Pop-up Image Gallery


In conclusion, creating a calendar pop-up in Excel can greatly enhance user experience and simplify date-related tasks. With the five methods outlined above, you can choose the best approach for your specific needs. Whether you prefer using an add-in, VBA, or a creative workaround, there's a solution for everyone. Share your thoughts and experiences with calendar pop-ups in the comments below!