Intro
Converting text to time in Excel can be a bit tricky, but with the right techniques, you can easily achieve this. In this article, we will explore the different methods to convert text to time in Excel, along with practical examples and step-by-step instructions.
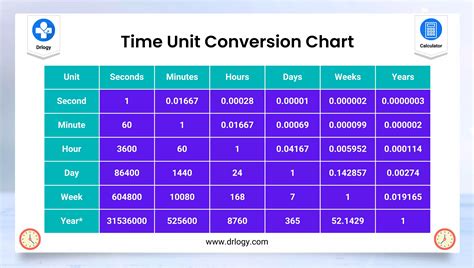
Understanding the Importance of Time Conversion
In many cases, you may receive data in text format, which includes time values. However, this text data cannot be used in calculations or analysis until it is converted to a time format that Excel can understand. That's where the conversion process comes in – to transform the text data into a usable time format.
Method 1: Using the TEXT TO COLUMN Feature
One of the easiest ways to convert text to time in Excel is by using the Text to Column feature. This feature allows you to split a single column into multiple columns based on a specific delimiter.
Here's how to do it:
- Select the cell range that contains the text data you want to convert.
- Go to the Data tab in the ribbon.
- Click on the Text to Column button in the Data Tools group.
- In the Convert Text to Columns Wizard, select the delimiter that separates the time values from the rest of the text. In most cases, this will be a colon (:).
- Click on Finish to complete the conversion process.
Method 2: Using the TIMEVALUE Function

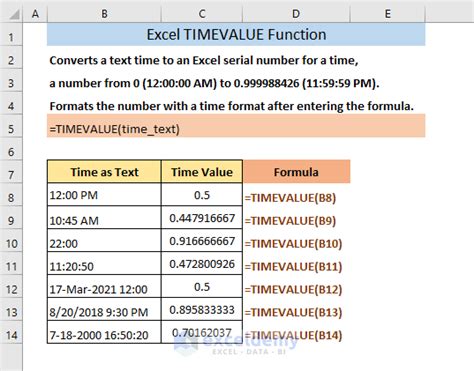
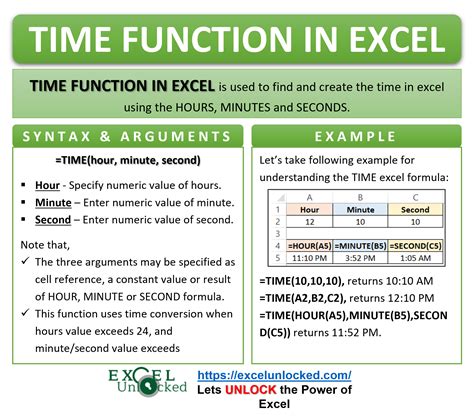
The TIMEVALUE function is a powerful tool in Excel that can convert text to time. This function takes a text string as input and returns a time value.
Here's the syntax:
TIMEVALUE(text)
Where text is the cell containing the time value in text format.
Example:
Suppose you have a cell that contains the text "12:30 PM". To convert this to a time value, you can use the following formula:
=TIMEVALUE(A1)
Assuming the text is in cell A1.
Method 3: Using the VALUE Function
The VALUE function is another useful tool in Excel that can convert text to time. This function takes a text string as input and returns a value.
Here's the syntax:
VALUE(text)
Where text is the cell containing the time value in text format.
Example:
Suppose you have a cell that contains the text "12:30 PM". To convert this to a time value, you can use the following formula:
=VALUE(A1)
Assuming the text is in cell A1.
Note that the VALUE function can also convert text to numbers, so be careful when using this function.
Method 4: Using VBA Macro
If you need to convert a large range of cells, using a VBA macro can be a more efficient way to do it.
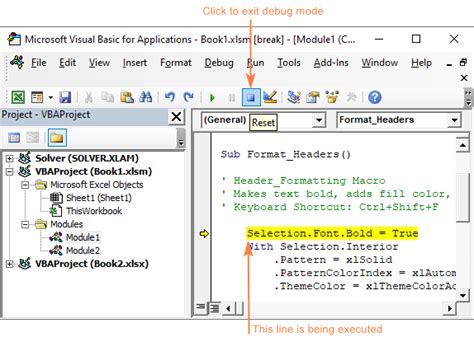
Here's an example VBA code that converts text to time:
Sub ConvertTextToTime() Dim rng As Range Dim cell As Range
Set rng = Selection
For Each cell In rng cell.Value = TimeValue(cell.Value) Next cell End Sub
To use this macro, follow these steps:
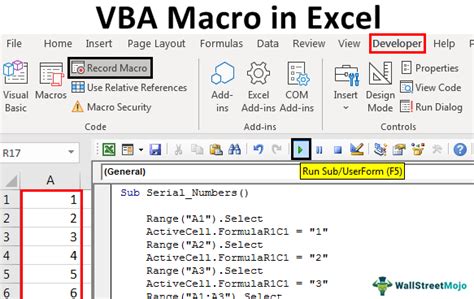
- Open the Visual Basic Editor by pressing Alt + F11 or by navigating to Developer > Visual Basic.
- In the Visual Basic Editor, click on Insert > Module to insert a new module.
- Paste the code into the module.
- Click on Run > Run Sub/UserForm to run the macro.
- Select the range of cells you want to convert.
Tips and Tricks
Here are some tips and tricks to keep in mind when converting text to time in Excel:
- Make sure the text data is in a format that Excel can understand. For example, "12:30 PM" is a valid time format, but "12:30PM" is not.
- Use the 24-hour clock format to avoid confusion. For example, "12:30" can be either AM or PM, but "12:30:00" is unambiguous.
- If you are working with a large dataset, consider using a VBA macro to automate the conversion process.
Conclusion
Converting text to time in Excel is a common task that can be achieved using various methods. Whether you use the Text to Column feature, the TIMEVALUE function, the VALUE function, or a VBA macro, the key is to understand the different techniques and choose the one that best suits your needs. By following the tips and tricks outlined in this article, you can easily convert text to time and take your Excel skills to the next level.
Gallery of Time Conversion in Excel