
The flexibility of working with data in Excel is one of its most powerful features. Among the various operations you can perform, swapping rows is a common task that can sometimes be challenging, especially for large datasets. However, with the right techniques, this process can be simplified and executed with ease.
Excel, being a versatile tool, offers multiple methods to swap rows, catering to different user preferences and needs. Whether you prefer using formulas, shortcuts, or the built-in features of Excel, there's a method that suits you. In this article, we'll explore the various techniques to swap rows in Excel, ensuring you can manage your data with efficiency.
Understanding the Need to Swap Rows
Before diving into the methods, it's essential to understand why swapping rows is necessary. Data organization, presentation, and analysis often require data to be in a specific order. For instance, you might want to prioritize tasks based on their deadlines, organize products by their categories, or present data in a specific sequence for better visualization. Swapping rows allows you to adjust the arrangement of your data to meet these needs.
Method 1: Swapping Rows Manually
One of the simplest methods, although not the most efficient for large datasets, is to swap rows manually. This involves cutting and pasting rows or using drag-and-drop functionality.
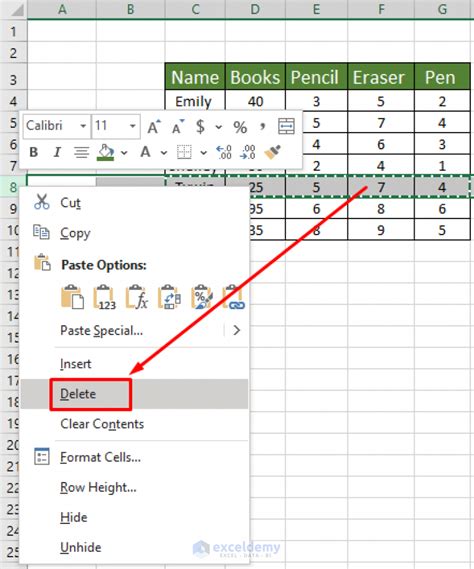
- Select the row you want to move by clicking on the row number on the left side of the Excel sheet.
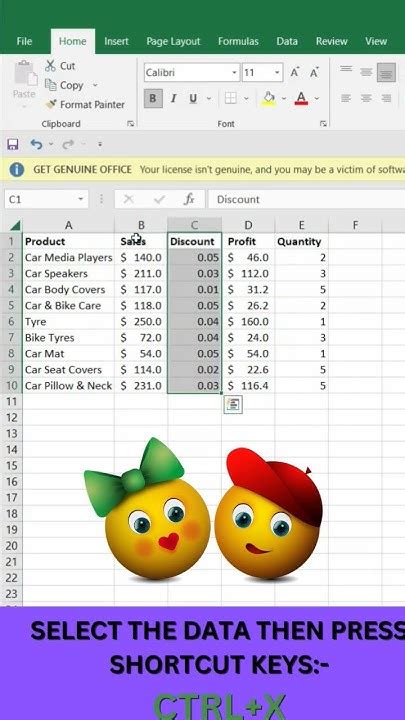
- Right-click and choose "Cut" or use the keyboard shortcut Ctrl+X (Windows) or Command+X (Mac).
- Select the destination row by clicking on the row number below where you want the cut row to be moved.
- Right-click and choose "Insert Cut Cells" or use the keyboard shortcut Ctrl+Shift+= (Windows) or Command+Shift+= (Mac).
This method is straightforward but can be time-consuming and prone to errors when dealing with multiple rows or large datasets.
Method 2: Using Formulas
For a more dynamic approach, you can use formulas to swap rows. This method is particularly useful when you want to automate the process based on certain conditions.
- Assume you have data in columns A and B and want to swap rows based on a condition in column C.
- Use an IF function in a new column to determine which value to display based on the condition.
For example: =IF(C2="Condition", A2, B2) for one set of data and =IF(C2="Condition", B2, A2) for the other.
- Copy this formula down for all your data.
- If your condition changes, the data will automatically adjust.
This method requires a basic understanding of Excel formulas but offers flexibility and automation.
Method 3: Utilizing Shortcuts
Excel shortcuts can greatly speed up your workflow, including swapping rows.

- Select the row you want to move.
- Use Alt+Shift+Down arrow (Windows) or Command+Shift+Down arrow (Mac) to move the row down one row at a time.
- Alternatively, use Alt+Shift+Up arrow (Windows) or Command+Shift+Up arrow (Mac) to move the row up.
This method is quick and efficient for small movements but can be tedious for larger datasets.
Method 4: Using Excel's Built-in Features
Excel also offers built-in features to manipulate rows, including sorting and filtering, which can indirectly help in swapping rows based on specific criteria.
- Select your data range.
- Go to the "Data" tab on the ribbon.
- Use the "Sort & Filter" group to sort your data based on any column.
- For more complex manipulations, consider using "Power Query" or "PivotTables."
This method is powerful and flexible, especially for large datasets, but requires a bit of learning to harness its full potential.
Conclusion and Next Steps
Swapping rows in Excel can be a straightforward process or a complex operation, depending on your data's complexity and your familiarity with Excel's features. By understanding the different methods available, you can choose the approach that best fits your needs, from manual adjustments to automated processes using formulas and Excel's built-in features.
Whether you're managing a small list or analyzing a large dataset, mastering the art of swapping rows in Excel will enhance your productivity and data management skills.
Gallery of Excel Row Swapping Images
Excel Row Swapping Image Gallery


Share Your Experience
Have you encountered a situation where swapping rows in Excel was crucial for your data analysis or presentation? Share your story and any tips you might have for our readers in the comments section below. Your experience can help others overcome similar challenges and enhance their Excel skills.