
Excel VBA is a powerful tool that can be used to automate and streamline tasks within Microsoft Excel. One of the most useful features of Excel VBA is the ability to create drop-down lists, which can be used to make data entry easier and more efficient. In this article, we will explore the process of creating a drop-down list in Excel VBA, including the benefits, steps, and best practices.
The Importance of Drop-Down Lists
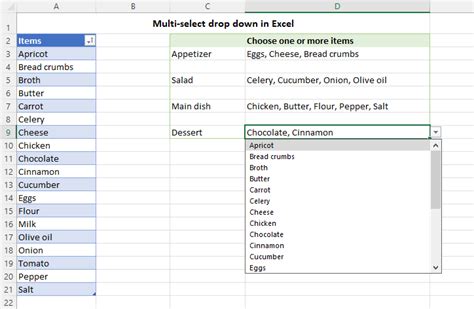
Drop-down lists are an essential feature in Excel, allowing users to select from a list of predefined options. This feature is particularly useful when working with large datasets or when data entry needs to be standardized. Drop-down lists can help to reduce errors, improve data consistency, and make data entry faster and more efficient.
Benefits of Creating a Drop-Down List in Excel VBA
Creating a drop-down list in Excel VBA offers several benefits, including:
- Improved data accuracy: By limiting user input to a predefined list of options, you can reduce errors and ensure that data is entered correctly.
- Increased efficiency: Drop-down lists can save time and effort by providing users with a quick and easy way to select from a list of options.
- Enhanced user experience: Drop-down lists can make data entry more intuitive and user-friendly, improving the overall user experience.
Step-by-Step Guide to Creating a Drop-Down List in Excel VBA
Creating a drop-down list in Excel VBA involves several steps, including:
Step 1: Set Up the Data Range

- Identify the range of cells that will contain the drop-down list options.
- Enter the list of options in the designated range.
Step 2: Create a Named Range
- Select the range of cells that contains the list of options.
- Go to the "Formulas" tab in the ribbon and click on "Define Name".
- Enter a name for the range, such as "DropdownOptions".
- Click "OK" to create the named range.
Step 3: Create a Drop-Down List
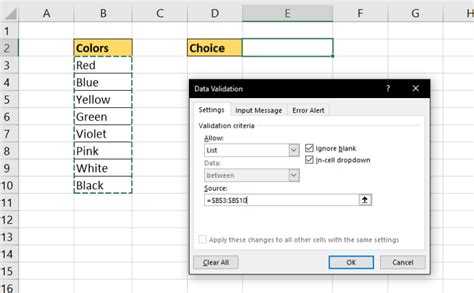
- Select the cell where you want to create the drop-down list.
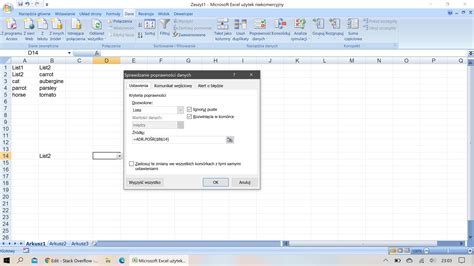
- Go to the "Data" tab in the ribbon and click on "Data Validation".
- Select "List" from the "Allow" dropdown menu.
- Enter the named range created in Step 2, such as "=DropdownOptions".
- Click "OK" to create the drop-down list.
Step 4: Add VBA Code to the Drop-Down List
- Open the Visual Basic Editor by pressing "Alt + F11" or by navigating to "Developer" tab in the ribbon and clicking on "Visual Basic".
- In the Visual Basic Editor, insert a new module by clicking on "Insert" and then "Module".
- Enter the following code:
Private Sub Worksheet_Change(ByVal Target As Range)
    If Target.Address = "$A$1" Then
        If Target.Value = "Option 1" Then
            ' Code to execute when Option 1 is selected
        ElseIf Target.Value = "Option 2" Then
            ' Code to execute when Option 2 is selected
        End If
    End If
End Sub
- Replace "$A$1" with the address of the cell that contains the drop-down list.
- Replace "Option 1" and "Option 2" with the actual options in your drop-down list.
- Add the desired code to execute when each option is selected.
Step 5: Test the Drop-Down List
- Save the workbook and close the Visual Basic Editor.
- Test the drop-down list by selecting different options and verifying that the code executes correctly.
Best Practices for Creating a Drop-Down List in Excel VBA
When creating a drop-down list in Excel VBA, it's essential to follow best practices to ensure that the list is user-friendly and efficient. Here are some tips to keep in mind:
- Use a clear and concise name for the named range.
- Use a consistent naming convention throughout the workbook.
- Test the drop-down list thoroughly to ensure that it works as expected.
- Use error handling to handle unexpected user input.
- Keep the code organized and well-documented.
Gallery of Excel VBA Drop-Down List Examples
Excel VBA Drop-Down List Examples

Conclusion
Creating a drop-down list in Excel VBA is a powerful way to improve data entry and reduce errors. By following the steps outlined in this article and using best practices, you can create a user-friendly and efficient drop-down list that meets your needs. Whether you're a beginner or an advanced user, Excel VBA drop-down lists are a valuable tool to have in your toolkit.