Mastering the art of date manipulation in Excel can be a game-changer for anyone who works with data. One of the most common tasks is extracting the month and year from a date. In this article, we will explore four ways to extract the month and year in Excel.
The Importance of Date Manipulation
Before we dive into the methods, let's quickly discuss why date manipulation is crucial in Excel. Dates are a fundamental part of any data set, and being able to extract specific information from them can help with analysis, reporting, and visualization. By extracting the month and year, you can perform tasks such as:
- Creating monthly or yearly reports
- Analyzing trends and patterns
- Filtering data by specific time periods
- Visualizing data using charts and graphs
Method 1: Using the MONTH and YEAR Functions
One of the simplest ways to extract the month and year is by using the MONTH and YEAR functions.

The syntax for these functions is as follows:
- MONTH(date): Returns the month of the date as a number (1-12)
- YEAR(date): Returns the year of the date as a number
For example, if you have a date in cell A1, you can use the following formulas to extract the month and year:
- =MONTH(A1) to extract the month
- =YEAR(A1) to extract the year
You can then use these values as needed in your analysis or reporting.
Method 2: Using the TEXT Function
Another way to extract the month and year is by using the TEXT function.
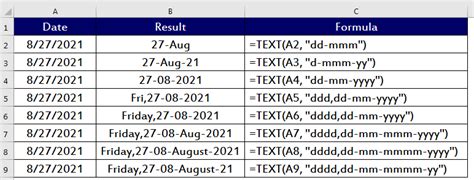
The TEXT function allows you to format a value as text, and you can use it to extract the month and year from a date. The syntax is as follows:
- TEXT(date, format_text): Formats the date as text using the specified format
To extract the month and year, you can use the following formula:
- =TEXT(A1, "mmm yyyy")
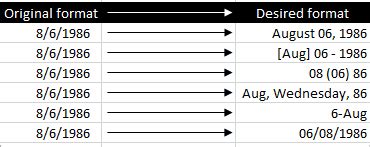
This formula will return the month as a three-letter abbreviation (e.g., Jan, Feb, Mar, etc.) and the year as a four-digit number.
Method 3: Using the Format Cells Option
If you want to extract the month and year without using a formula, you can use the Format Cells option.
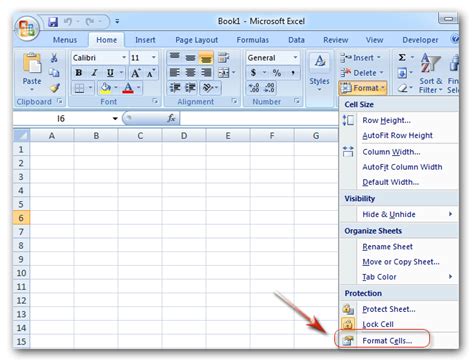
To do this, select the cell containing the date and go to the Home tab > Number group > Format Cells. In the Format Cells dialog box, select the Custom category and enter the following format:
- mmm yyyy
This will format the date to display only the month and year.
Method 4: Using Power Query
If you're using Excel 2010 or later, you can use Power Query to extract the month and year.
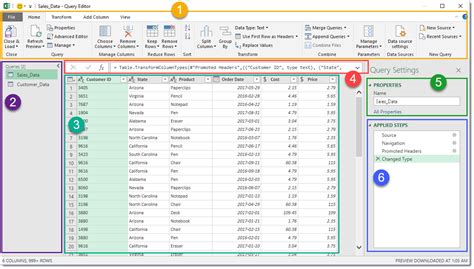
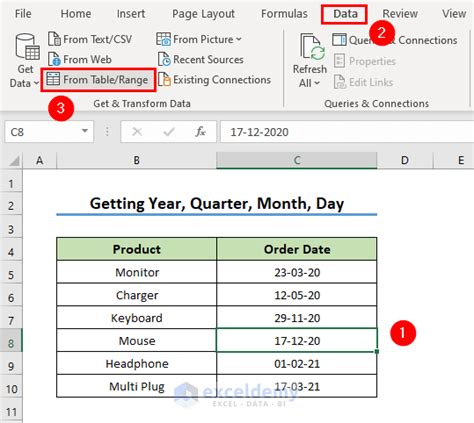
To do this, go to the Data tab > New Query > From Other Sources > Blank Query. In the Power Query Editor, create a new column by going to the Add Column tab > Custom Column. Enter the following formula:
- = Text.Month([Date]) & " " & Text.Year([Date])
This formula will extract the month and year from the date and combine them into a single text string.
Gallery of Excel Date Manipulation
Excel Date Manipulation Gallery



We hope this article has helped you learn four ways to extract the month and year in Excel. Whether you're using formulas, format cells, or Power Query, being able to manipulate dates is an essential skill for any Excel user. If you have any questions or need further assistance, feel free to ask in the comments below. Don't forget to share this article with your friends and colleagues who may find it helpful!
