
Macros in Microsoft Word can be a huge time-saver, allowing you to automate repetitive tasks with just the click of a button. Creating a Word macro is easier than you might think, and in this article, we'll walk you through the process step by step.
In today's fast-paced work environment, efficiency is key. By automating tasks, you can free up more time to focus on the things that matter most. Whether you're a student, a business professional, or simply a Word enthusiast, learning how to create a macro can be a game-changer.
So, let's dive in and explore the world of Word macros!
What is a Macro in Microsoft Word?
A macro in Microsoft Word is a set of instructions that can be executed with a single command. Macros are used to automate repetitive tasks, such as formatting text, inserting images, or even creating entire documents. By recording a series of actions, you can create a macro that can be run at any time, saving you time and effort.
Step 1: Enable the Developer Tab
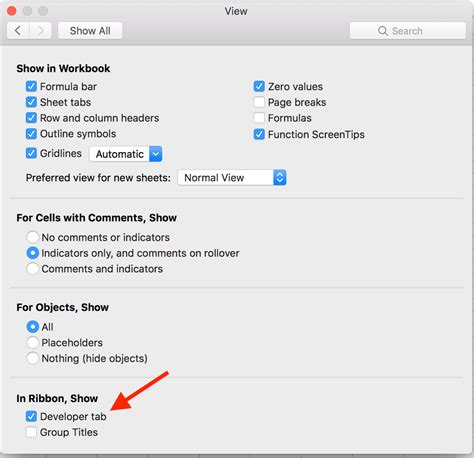
Before you can start creating macros, you need to enable the Developer tab in Word. To do this:
- Go to the File menu and select Options
- In the Word Options window, click on Customize Ribbon
- Check the box next to Developer and click OK
The Developer tab will now appear in the ribbon, giving you access to the tools you need to create and manage macros.
Step 2: Record a Macro
To create a macro, you need to record a series of actions. To start recording a macro:
- Go to the Developer tab and click on Record Macro
- In the Record Macro window, enter a name for your macro and click OK
- Start performing the actions you want to record, such as formatting text or inserting an image
- When you're finished, click on Stop Recording
Word will now record all the actions you performed, creating a macro that can be run at any time.
Step 3: Edit a Macro

Sometimes, you may need to edit a macro to make changes or improvements. To edit a macro:
- Go to the Developer tab and click on Macros
- In the Macro window, select the macro you want to edit and click on Edit
- The macro will open in the Visual Basic for Applications (VBA) editor, where you can make changes to the code
When you're finished editing, click on Save to save your changes.
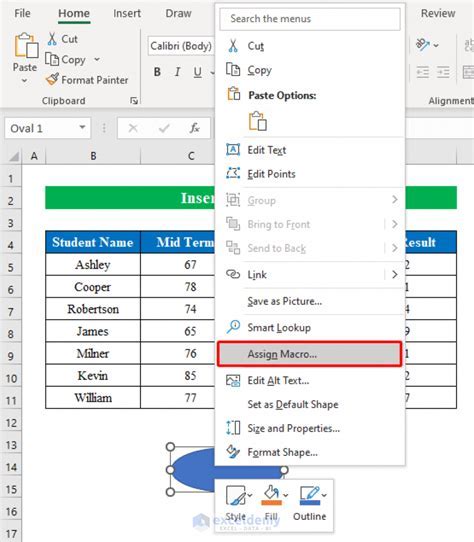
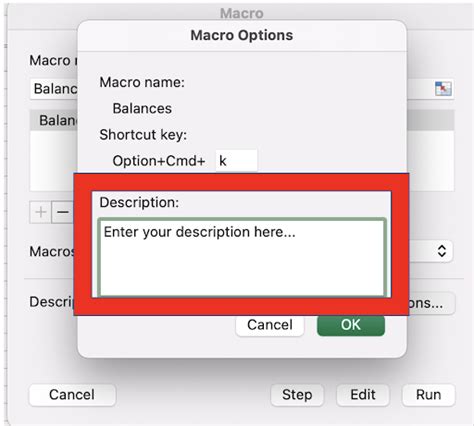
Step 4: Assign a Macro to a Button or Shortcut

To make your macro more accessible, you can assign it to a button or shortcut. To do this:
- Go to the Developer tab and click on Macros
- In the Macro window, select the macro you want to assign and click on Options
- In the Macro Options window, click on the Assign button
- Choose the button or shortcut you want to assign the macro to and click OK
Now, when you click the button or press the shortcut, the macro will run automatically.
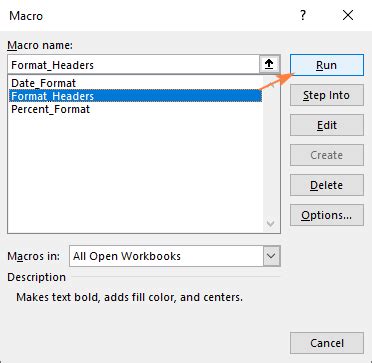
Step 5: Run a Macro

Finally, it's time to run your macro! To do this:
- Go to the Developer tab and click on Macros
- In the Macro window, select the macro you want to run and click on Run
- The macro will execute the actions you recorded, automating the task with just a single click
And that's it! With these 5 easy steps, you can create a Word macro that will save you time and effort.
Gallery of Word Macro Images
Word Macro Image Gallery


In conclusion, creating a Word macro is a simple process that can save you time and effort. By following these 5 easy steps, you can automate repetitive tasks and increase your productivity. Whether you're a student, a business professional, or simply a Word enthusiast, learning how to create a macro is a skill that will benefit you in the long run.
We hope you found this article helpful! If you have any questions or comments, please feel free to share them below.