
Stem and leaf plots are a great way to visualize the distribution of a dataset, and Excel makes it easy to create them. In this article, we'll explore five easy ways to create a stem and leaf plot in Excel.
What is a Stem and Leaf Plot?
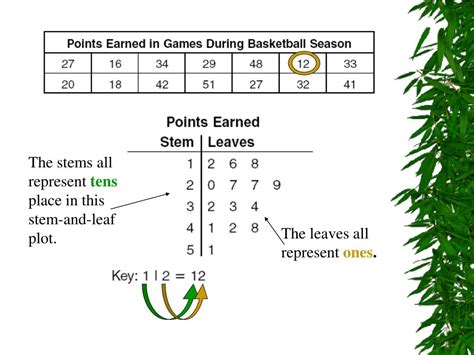
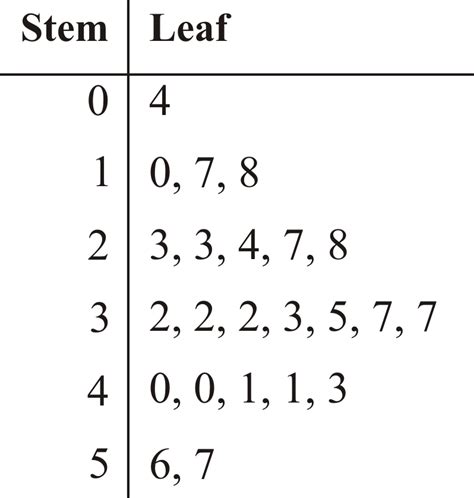
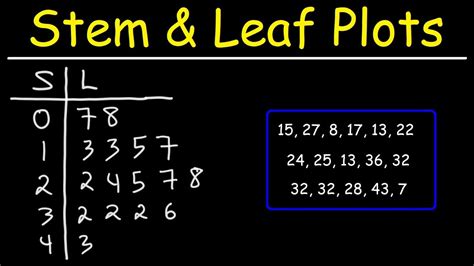
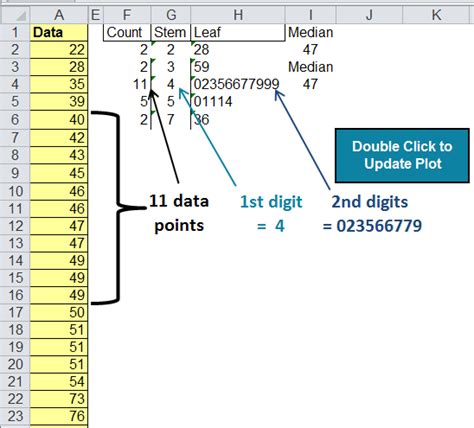
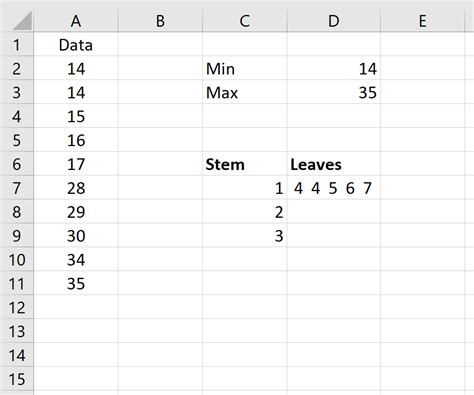
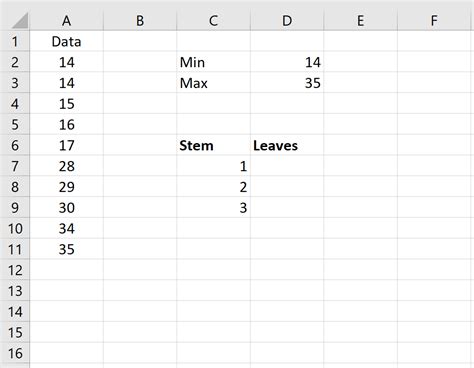
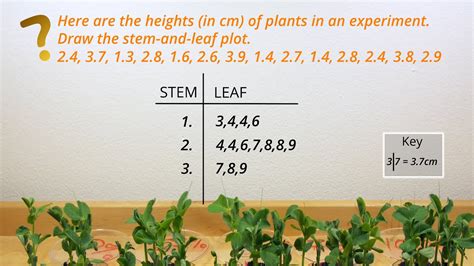
A stem and leaf plot is a type of chart that displays the distribution of a dataset. It's a great way to visualize the shape of the data and identify patterns, such as skewness or outliers. The plot consists of two columns: the stem column, which contains the leading digits of the data points, and the leaf column, which contains the trailing digits.
Method 1: Using the built-in Excel Function
Excel has a built-in function for creating stem and leaf plots. To use it, follow these steps:
- Select the data range that you want to plot.
- Go to the "Data" tab in the ribbon.
- Click on the "Data Analysis" button in the "Analysis" group.
- Select "Stem and Leaf Plot" from the list of available tools.
- Click "OK" to create the plot.
Step-by-Step Guide
- Select the data range that you want to plot.
- Go to the "Data" tab in the ribbon.
- Click on the "Data Analysis" button in the "Analysis" group.
- Select "Stem and Leaf Plot" from the list of available tools.
- Click "OK" to create the plot.
Method 2: Using a Pivot Table
You can also create a stem and leaf plot using a pivot table. To do this, follow these steps:
- Select the data range that you want to plot.
- Go to the "Insert" tab in the ribbon.
- Click on the "PivotTable" button in the "Tables" group.
- Select a cell to place the pivot table.
- Drag the data field to the "Row Labels" area.
- Right-click on the data field and select "Value Field Settings".
- Click on the "Number" button and select "Stem and Leaf Plot".
Step-by-Step Guide
- Select the data range that you want to plot.
- Go to the "Insert" tab in the ribbon.
- Click on the "PivotTable" button in the "Tables" group.
- Select a cell to place the pivot table.
- Drag the data field to the "Row Labels" area.
- Right-click on the data field and select "Value Field Settings".
- Click on the "Number" button and select "Stem and Leaf Plot".
Method 3: Using a Formula
You can also create a stem and leaf plot using a formula. To do this, follow these steps:
- Select the cell where you want to display the stem and leaf plot.
- Type the formula:
=REPT(" ",5-LEN(A1))&LEFT(A1,5)&" | "&RIGHT(A1,LEN(A1)-5) - Press Enter to apply the formula.
- Copy the formula down to the rest of the cells in the column.
Step-by-Step Guide
- Select the cell where you want to display the stem and leaf plot.
- Type the formula:
=REPT(" ",5-LEN(A1))&LEFT(A1,5)&" | "&RIGHT(A1,LEN(A1)-5) - Press Enter to apply the formula.
- Copy the formula down to the rest of the cells in the column.
Method 4: Using a Macro
You can also create a stem and leaf plot using a macro. To do this, follow these steps:
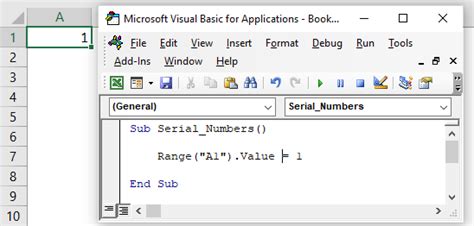
- Open the Visual Basic Editor by pressing Alt+F11.
- Insert a new module by clicking "Insert" > "Module".
- Paste the following code into the module:
Sub StemAndLeafPlot()
  Dim rng As Range
  Set rng = Selection
  Dim stem As String
  Dim leaf As String
  For Each cell In rng
    stem = Left(cell.Value, 5)
    leaf = Right(cell.Value, Len(cell.Value) - 5)
    Debug.Print stem & " | " & leaf
  Next cell
End Sub
- Close the Visual Basic Editor.
- Select the data range that you want to plot.
- Press Alt+F8 to run the macro.
Step-by-Step Guide
- Open the Visual Basic Editor by pressing Alt+F11.
- Insert a new module by clicking "Insert" > "Module".
- Paste the following code into the module:
Sub StemAndLeafPlot()
  Dim rng As Range
  Set rng = Selection
  Dim stem As String
  Dim leaf As String
  For Each cell In rng
    stem = Left(cell.Value, 5)
    leaf = Right(cell.Value, Len(cell.Value) - 5)
    Debug.Print stem & " | " & leaf
  Next cell
End Sub
- Close the Visual Basic Editor.
- Select the data range that you want to plot.
- Press Alt+F8 to run the macro.
Method 5: Using a Third-Party Add-in
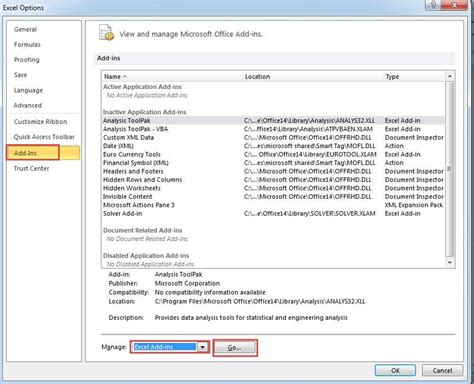
There are several third-party add-ins available that can help you create a stem and leaf plot in Excel. One popular option is the "Analysis ToolPak" add-in. To use this add-in, follow these steps:
- Go to the "File" tab in the ribbon.
- Click on the "Options" button.
- Click on the "Add-ins" button.
- Check the box next to "Analysis ToolPak".
- Click "OK" to install the add-in.
Step-by-Step Guide
- Go to the "File" tab in the ribbon.
- Click on the "Options" button.
- Click on the "Add-ins" button.
- Check the box next to "Analysis ToolPak".
- Click "OK" to install the add-in.
Stem and Leaf Plot Image Gallery


We hope this article has helped you learn how to create a stem and leaf plot in Excel. Whether you use the built-in function, a pivot table, a formula, a macro, or a third-party add-in, creating a stem and leaf plot is a great way to visualize the distribution of a dataset.