Locking a cell in Excel can be a useful feature to prevent users from modifying specific cells or ranges. This can be particularly helpful when creating formulas, as it ensures that the formula remains intact and is not accidentally altered. In this article, we will explore five ways to lock a cell in Excel formula.
Why Lock Cells in Excel Formula?
Locking cells in Excel formulas can help to:
- Prevent accidental changes to formulas
- Protect sensitive data or calculations
- Maintain data integrity and accuracy
- Restrict user access to specific cells or ranges
- Improve overall spreadsheet security
Method 1: Using Absolute References
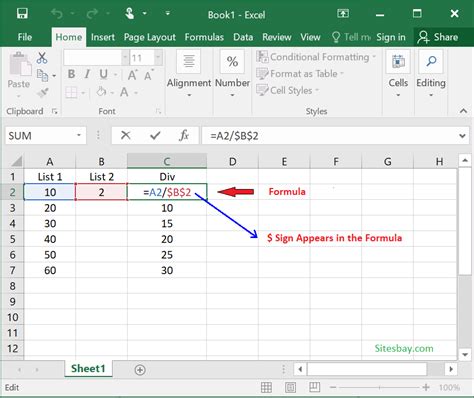
One way to lock a cell in Excel formula is by using absolute references. Absolute references are denoted by a dollar sign ($) before the column letter and row number. For example, $A$1 refers to the cell in column A, row 1. By using absolute references, you can ensure that the formula always refers to the same cell, even if the formula is copied or moved to a different location.
To use absolute references:
- Select the cell containing the formula
- Press F4 to toggle between relative and absolute references
- Alternatively, type the dollar sign ($) before the column letter and row number
Example:
Suppose you have a formula in cell B2 that refers to cell A1. To lock the reference to cell A1, you can modify the formula to use an absolute reference:
= $A$1 * 2
This ensures that the formula always multiplies the value in cell A1 by 2, regardless of where the formula is copied or moved.
Method 2: Using Named Ranges
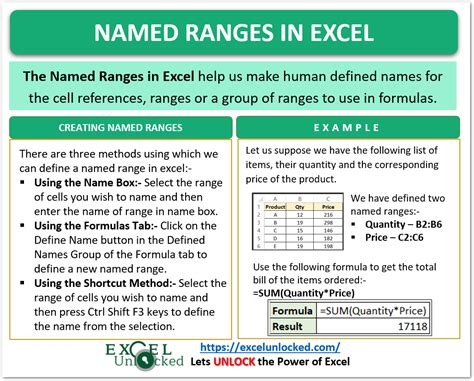
Another way to lock a cell in Excel formula is by using named ranges. Named ranges are labels that you can assign to specific cells or ranges, making it easier to reference them in formulas.
To create a named range:
- Select the cell or range you want to name
- Go to the "Formulas" tab in the ribbon
- Click on "Define Name"
- Enter a name for the range and click "OK"
To use a named range in a formula:
- Type the equals sign (=)
- Type the name of the range
- Press Enter to complete the formula
Example:
Suppose you have a cell containing a tax rate that you want to use in multiple formulas. You can create a named range called "Tax_Rate" and refer to it in your formulas:
= Tax_Rate * Sales
This ensures that the formula always uses the tax rate value, regardless of where the formula is copied or moved.
Method 3: Using Locked Cells
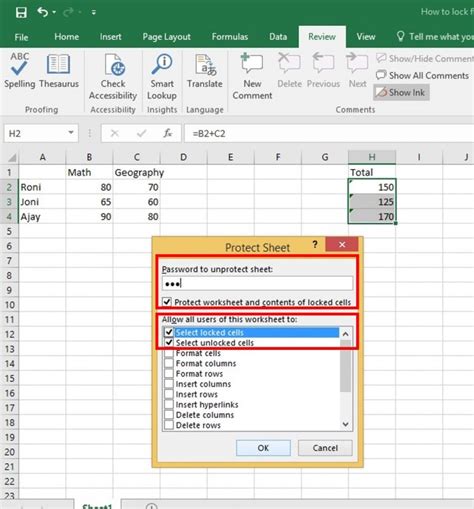
You can also lock a cell in Excel formula by using the "Lock Cells" feature. This feature allows you to protect specific cells or ranges from being modified.
To lock cells:
- Select the cells or range you want to lock
- Go to the "Home" tab in the ribbon
- Click on "Format" in the "Cells" group
- Click on "Lock Cells"
- Select the "Locked" option and click "OK"
To use locked cells in a formula:
- Type the equals sign (=)
- Type the formula as usual
- Press Enter to complete the formula
Example:
Suppose you have a cell containing a confidential value that you want to use in a formula. You can lock the cell to prevent others from modifying it:
=Locked_Cell * 2
This ensures that the formula always uses the confidential value, regardless of who modifies the formula.
Method 4: Using Protected Worksheets
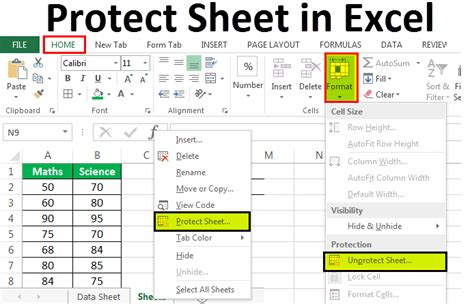
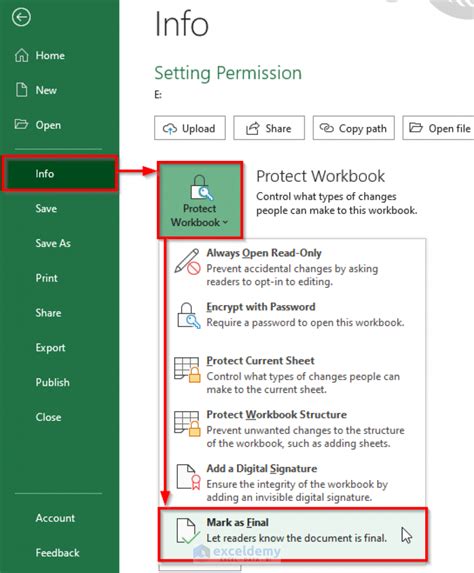
Another way to lock a cell in Excel formula is by using protected worksheets. Protected worksheets allow you to restrict access to specific worksheets or entire workbooks.
To protect a worksheet:
- Go to the "Review" tab in the ribbon
- Click on "Protect Sheet"
- Select the "Protect Worksheet" option and click "OK"
To use protected worksheets in a formula:
- Type the equals sign (=)
- Type the formula as usual
- Press Enter to complete the formula
Example:
Suppose you have a worksheet containing confidential data that you want to use in a formula. You can protect the worksheet to prevent others from modifying it:
=Protected_Sheet * 2
This ensures that the formula always uses the confidential data, regardless of who modifies the formula.
Method 5: Using VBA Macros
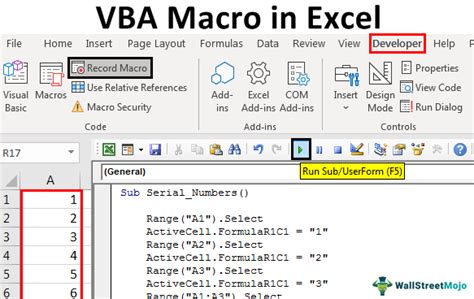
Finally, you can lock a cell in Excel formula using VBA macros. VBA macros allow you to automate tasks and restrict access to specific cells or ranges.
To create a VBA macro:
- Press Alt + F11 to open the Visual Basic Editor
- Click on "Insert" in the menu bar
- Click on "Module"
- Paste the following code:
Private Sub Worksheet_Change(ByVal Target As Range)
    If Target.Address = "$A$1" Then
        MsgBox "You cannot modify this cell"
        Application.EnableEvents = False
        Application.Undo
        Application.EnableEvents = True
    End If
End Sub
- Click on "Run" to test the macro
To use VBA macros in a formula:
- Type the equals sign (=)
- Type the formula as usual
- Press Enter to complete the formula
Example:
Suppose you have a cell containing a confidential value that you want to use in a formula. You can create a VBA macro to lock the cell:
=Locked_Cell * 2
This ensures that the formula always uses the confidential value, regardless of who modifies the formula.
Locking Cells in Excel Formula Gallery
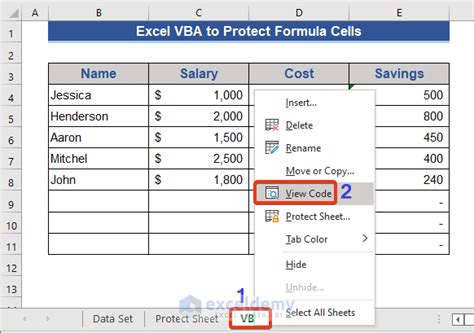

We hope this article has provided you with valuable insights on how to lock cells in Excel formulas. Whether you're using absolute references, named ranges, locked cells, protected worksheets, or VBA macros, there's a method that suits your needs. Remember to share your experiences and tips in the comments below, and don't hesitate to reach out if you have any questions or need further assistance.
