Intro
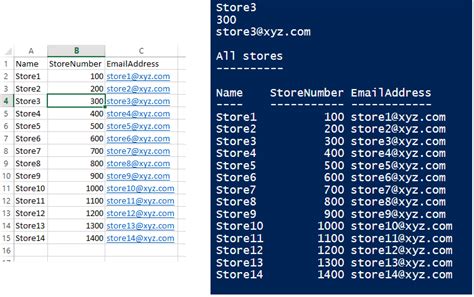
Master reading Excel files with PowerShell using these 5 efficient methods. Learn how to import, export, and manipulate Excel data with ease using PowerShell scripting, including working with CSV, XML, and COM objects. Boost your productivity with automation and integrate Excel data into your PowerShell workflows.
Mastering the art of reading Excel files with PowerShell is an essential skill for any administrator or automation enthusiast. In today's fast-paced digital landscape, being able to extract and manipulate data from Excel files can significantly streamline workflows and boost productivity. In this article, we'll delve into the world of PowerShell and explore five efficient ways to read Excel files, catering to various scenarios and requirements.
Why Read Excel Files with PowerShell?
Before we dive into the nitty-gritty of reading Excel files, let's understand why PowerShell is an excellent choice for this task. PowerShell is a powerful task automation and configuration management framework from Microsoft, built on top of the.NET framework. Its flexibility and extensive library of cmdlets make it an ideal tool for automating a wide range of tasks, including data manipulation.
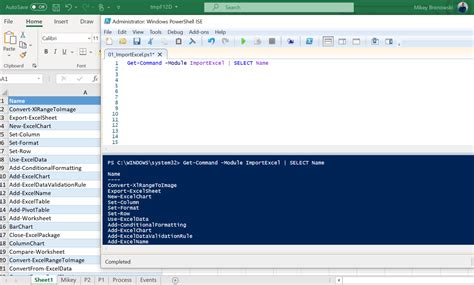
The Benefits of Using PowerShell
- Efficient Data Extraction: PowerShell enables you to extract data from Excel files quickly, making it perfect for automating tasks that involve data analysis or reporting.
- Automation: By leveraging PowerShell, you can automate the entire process of reading Excel files, saving time and reducing manual errors.
- Scripting: PowerShell scripts can be easily shared and executed across different machines, making it a versatile tool for team collaboration.
Method 1: Using the Import-Excel Module
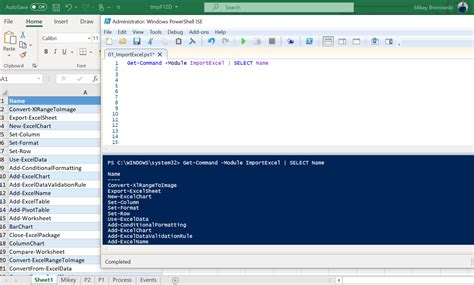
One of the most straightforward methods to read Excel files with PowerShell is by using the Import-Excel module. This module provides a simple and efficient way to import data from Excel files into PowerShell.
To use the Import-Excel module, follow these steps:
- Install the module using the command
Install-Module -Name ImportExcel. - Use the
Import-Excelcmdlet to read the Excel file, specifying the file path and any additional parameters as needed.
Example:
Import-Excel -Path "C:\example.xlsx" -WorksheetName "Sheet1"
Method 2: Using the Excel COM Object
Another approach to reading Excel files involves using the Excel COM (Component Object Model) object. This method requires Excel to be installed on the machine and provides more control over the Excel application.
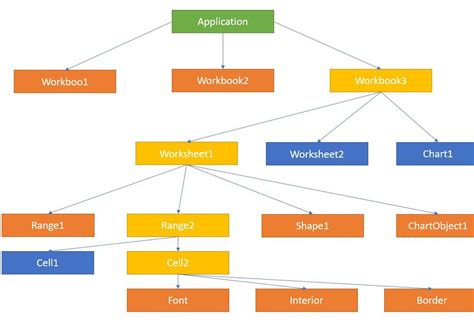
To use the Excel COM object, follow these steps:
- Create a new Excel COM object using the command
$excel = New-Object -ComObject Excel.Application. - Open the Excel file using the
Openmethod, specifying the file path. - Use the
Worksheetscollection to access the desired worksheet and read its data.
Example:
$excel = New-Object -ComObject Excel.Application
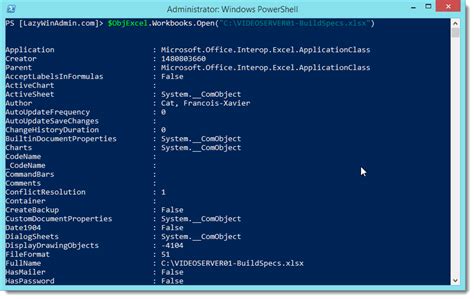
$workbook = $excel.Workbooks.Open("C:\example.xlsx")
$worksheet = $workbook.Worksheets.Item(1)
$range = $worksheet.Range("A1:B2")
$data = $range.Value2
Method 3: Using the EPPlus Library
EPPlus is a popular.NET library for reading and writing Excel files. PowerShell can leverage this library to read Excel files, providing a more flexible and efficient approach.

To use the EPPlus library, follow these steps:
- Install the EPPlus NuGet package using the command
Install-Package EPPlus. - Load the EPPlus assembly using the command
[System.Reflection.Assembly]::LoadFrom("C:\EPPlus.dll"). - Use the
ExcelPackageclass to read the Excel file, specifying the file path.
Example:
$package = New-Object OfficeOpenXml.ExcelPackage("C:\example.xlsx")
$worksheet = $package.Workbook.Worksheets["Sheet1"]
$data = $worksheet.Dimension.End.Row
Method 4: Using the OpenXML SDK
The OpenXML SDK is a set of libraries provided by Microsoft for working with Office file formats, including Excel. PowerShell can use this SDK to read Excel files, offering a high degree of control over the file structure.
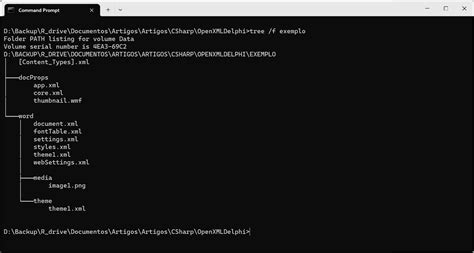
To use the OpenXML SDK, follow these steps:
- Install the OpenXML NuGet package using the command
Install-Package DocumentFormat.OpenXml. - Load the OpenXML assembly using the command
[System.Reflection.Assembly]::LoadFrom("C:\DocumentFormat.OpenXml.dll"). - Use the
SpreadsheetDocumentclass to read the Excel file, specifying the file path.
Example:
$document = [DocumentFormat.OpenXml.Packaging.SpreadsheetDocument]::Open("C:\example.xlsx", $false)
$workbookPart = $document.WorkbookPart
$worksheetPart = $workbookPart.WorksheetParts.First()
$data = $worksheetPart.Worksheet.Descendants().ToList()
Method 5: Using the PowerShell Excel Module (PSExcel)
The PowerShell Excel Module (PSExcel) is a community-driven module for working with Excel files in PowerShell. This module provides a simple and intuitive way to read Excel files, making it an excellent choice for beginners.

To use the PSExcel module, follow these steps:
- Install the module using the command
Install-Module -Name PSExcel. - Use the
Get-ExcelSheetcmdlet to read the Excel file, specifying the file path and any additional parameters as needed.
Example:
Get-ExcelSheet -Path "C:\example.xlsx" -WorksheetName "Sheet1"
Excel and PowerShell Image Gallery


In conclusion, reading Excel files with PowerShell offers a wide range of benefits, including efficient data extraction, automation, and scripting capabilities. By leveraging the methods outlined in this article, you can streamline your workflows and take your data analysis to the next level. Whether you're a seasoned administrator or just starting with PowerShell, mastering the art of reading Excel files will undoubtedly enhance your productivity and skills.
What's your favorite method for reading Excel files with PowerShell? Share your thoughts and experiences in the comments section below!
