
Learn 5 easy ways to fix a ripped shirt, including sewing, patching, and fabric glue techniques to repair tears, holes, and frays instantly.
The frustration of dealing with a ripped shirt can be overwhelming, especially if it's your favorite one. However, before you consider throwing it away, there are several ways to fix a shirt rip, depending on the size and location of the tear. In this article, we will explore the importance of repairing clothes, the benefits of fixing a shirt rip, and provide a step-by-step guide on how to do it.
Ripped shirts can be a nuisance, but they can also be an opportunity to get creative and practice your repair skills. With the increasing awareness of sustainability and reducing waste, fixing a shirt rip is not only a cost-effective solution but also an environmentally friendly one. By learning how to fix a shirt rip, you can extend the life of your clothes, reduce your carbon footprint, and develop a new skill.
The benefits of fixing a shirt rip go beyond just saving money and reducing waste. It can also be a fun and rewarding DIY project that allows you to express your creativity and personalize your clothes. Whether you're a beginner or an experienced sewer, fixing a shirt rip can be a great way to improve your sewing skills and build your confidence. Moreover, repairing your clothes can also be a way to preserve memories and sentimental value, especially if the shirt holds a special meaning to you.
Understanding the Types of Shirt Rips

Before we dive into the ways to fix a shirt rip, it's essential to understand the different types of tears that can occur. Shirt rips can be classified into three main categories: small tears, large tears, and punctures. Small tears are usually less than an inch long and can be easily fixed with a needle and thread. Large tears, on the other hand, can be several inches long and may require more extensive repair work, such as patching or darning. Punctures are small holes that can be caused by sharp objects or accidents, and they can be fixed using a variety of techniques, including sewing, patching, or using fabric glue.
5 Ways to Fix a Shirt Rip
Now that we've covered the basics, let's move on to the 5 ways to fix a shirt rip. These methods include:
- Sewing: This is the most common way to fix a shirt rip, especially for small tears. You can use a needle and thread to sew the tear shut, either by hand or using a sewing machine.
- Patching: This method involves applying a patch of fabric over the tear to reinforce the area and prevent further damage. You can use a pre-made patch or create your own using a piece of fabric that matches the shirt.
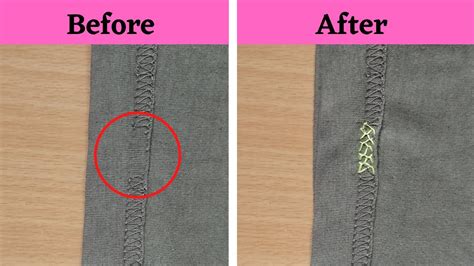
- Darning: This is a traditional technique that involves weaving yarn or thread over the tear to create a sturdy and durable repair. Darning can be time-consuming, but it's a great way to fix large tears or punctures.
- Fabric glue: This is a quick and easy way to fix small tears or punctures, especially if you're not comfortable with sewing. Fabric glue can be applied directly to the tear, and it dries quickly to create a strong bond.
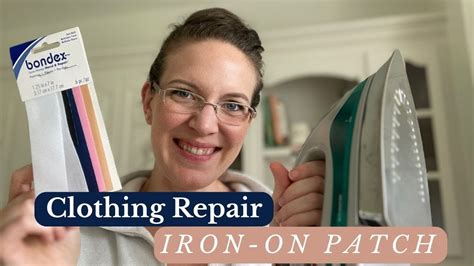
- Iron-on patches: These are pre-made patches that can be applied to the shirt using a hot iron. Iron-on patches are easy to use and can be a great solution for small tears or punctures.
Step-by-Step Guide to Fixing a Shirt Rip
Here's a step-by-step guide to fixing a shirt rip using the sewing method:
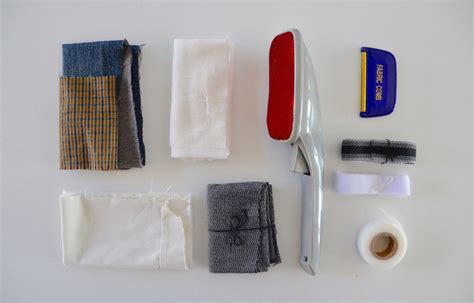
- Gather your materials: You'll need a needle, thread, scissors, and a sewing machine (optional).
- Examine the tear: Take a closer look at the tear and determine the best way to fix it. If the tear is small, you can sew it shut using a simple running stitch. If the tear is larger, you may need to use a more complex stitch or apply a patch.
- Thread your needle: Thread your needle with the matching thread and tie a knot at the end.
- Sew the tear shut: Bring the needle up through the fabric on one side of the tear and down through the fabric on the other side. Continue sewing the tear shut using a simple running stitch or a more complex stitch, depending on the size of the tear.
- Tie a knot: Once you've sewn the tear shut, tie a knot to secure the thread.
- Trim the excess thread: Use scissors to trim the excess thread and remove any loose ends.
Tips and Tricks for Fixing a Shirt Rip

Here are some tips and tricks to keep in mind when fixing a shirt rip:
- Use a matching thread: Make sure to use a thread that matches the color of the shirt to create a seamless repair.
- Use a denim needle: If you're fixing a tear in a denim shirt, use a denim needle to prevent the thread from breaking.
- Apply a patch: If the tear is large or in a sensitive area, consider applying a patch to reinforce the fabric and prevent further damage.
- Use fabric glue: If you're not comfortable with sewing, consider using fabric glue to fix small tears or punctures.
- Iron the shirt: After fixing the tear, iron the shirt to remove any wrinkles and creases.
Common Mistakes to Avoid When Fixing a Shirt Rip

Here are some common mistakes to avoid when fixing a shirt rip:
- Using the wrong thread: Using a thread that doesn't match the color of the shirt can create a visible repair that stands out.
- Not using a denim needle: Using a regular needle to fix a tear in a denim shirt can cause the thread to break, leading to further damage.
- Not applying a patch: Failing to apply a patch to a large tear or puncture can lead to further damage and require more extensive repair work.
- Not ironing the shirt: Failing to iron the shirt after fixing the tear can leave wrinkles and creases that can be visible.
Conclusion and Final Thoughts

Fixing a shirt rip can be a simple and rewarding DIY project that allows you to extend the life of your clothes, reduce waste, and develop a new skill. By understanding the different types of shirt rips, using the right materials and techniques, and following the step-by-step guide, you can fix a shirt rip with ease. Remember to use a matching thread, apply a patch if necessary, and iron the shirt after fixing the tear to create a seamless repair. With practice and patience, you can become a pro at fixing shirt rips and enjoy the satisfaction of repairing your own clothes.
Gallery of Shirt Rip Repair
Shirt Rip Repair Image Gallery
We hope this article has provided you with the knowledge and confidence to fix a shirt rip with ease. Whether you're a beginner or an experienced sewer, repairing your clothes can be a fun and rewarding DIY project that allows you to extend the life of your clothes, reduce waste, and develop a new skill. If you have any questions or comments, please don't hesitate to share them with us. We'd love to hear from you and help you with any shirt rip repair projects you may have.