
Are you tired of struggling to create a stem and leaf plot in Excel? Look no further! In this article, we will guide you through the easy steps to create a stem and leaf plot in Excel. Whether you're a student, teacher, or statistician, you'll be able to create a stem and leaf plot with ease.
What is a Stem and Leaf Plot?
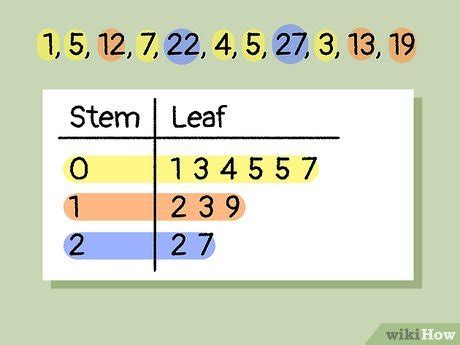
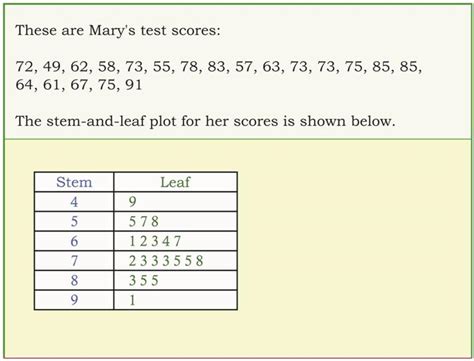
A stem and leaf plot is a type of graphical representation that displays the distribution of data. It's particularly useful for showing the shape and spread of a dataset. In a stem and leaf plot, each data point is split into two parts: the stem and the leaf. The stem represents the first part of the data, while the leaf represents the second part.
Why Use a Stem and Leaf Plot?
Stem and leaf plots are useful for:
- Visualizing the distribution of data
- Identifying patterns and trends
- Comparing datasets
- Checking for outliers
Creating a Stem and Leaf Plot in Excel
Now that we've covered the basics, let's dive into creating a stem and leaf plot in Excel.
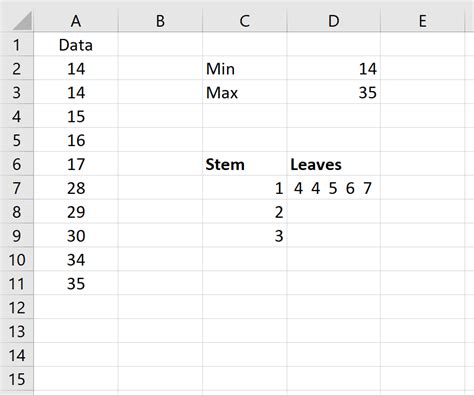
Step 1: Prepare Your Data
Start by preparing your data in a single column. Make sure the data is sorted in ascending order.
Step 2: Create a Helper Column
Create a new column next to your data column. This will be used to extract the stem and leaf values. Enter the formula =INT(A2/10) in the first cell of the new column, assuming your data is in column A. This will extract the stem value.

Step 3: Create Another Helper Column
Create another new column to extract the leaf value. Enter the formula =MOD(A2,10) in the first cell of the new column. This will extract the leaf value.
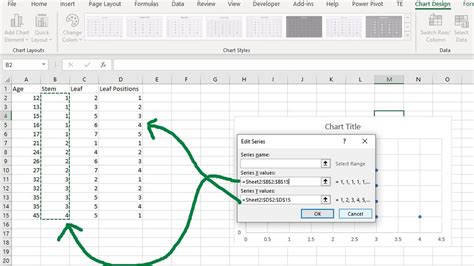
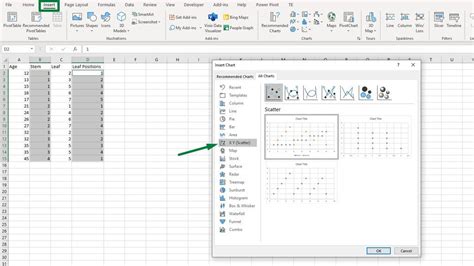
Step 4: Create the Stem and Leaf Plot
Select the data range, including the two helper columns. Go to the "Insert" tab and click on "PivotTable". Create a pivot table with the stem values in the row labels and the leaf values in the column labels.

Step 5: Format the Stem and Leaf Plot
Format the pivot table to display the stem and leaf values correctly. You can adjust the layout, formatting, and sorting to suit your needs.
And that's it! You now have a stem and leaf plot in Excel.
Tips and Variations
- Use different stem and leaf values to customize the plot.
- Add a title and labels to the plot for better clarity.
- Experiment with different formatting options to enhance the visualization.
Gallery of Stem and Leaf Plots
Stem and Leaf Plot Gallery


Conclusion
Creating a stem and leaf plot in Excel is a straightforward process that can be completed in just a few steps. By following the instructions outlined in this article, you can create a stem and leaf plot that effectively visualizes your data. Remember to experiment with different stem and leaf values, formatting options, and datasets to get the most out of this powerful visualization tool.
What's Next?
- Try creating a stem and leaf plot with different datasets and stem values.
- Experiment with other visualization tools in Excel, such as histograms and box plots.
- Share your stem and leaf plots with others and get feedback on how to improve them.
We hope this article has been helpful in teaching you how to create a stem and leaf plot in Excel. If you have any questions or need further assistance, please don't hesitate to ask.