
Intro
Managing employee absences can be a challenging task for HR professionals and managers. An Excel employee absence schedule can help streamline the process, reduce errors, and improve communication. In this article, we will explore five ways to create an Excel employee absence schedule.
Creating an effective employee absence schedule requires careful planning, consideration of various factors, and a user-friendly design. Before we dive into the methods, let's discuss the importance of having a well-organized absence schedule.
An employee absence schedule helps employers keep track of employee absences, including vacation days, sick leaves, and other types of absences. This information is crucial for:
- Planning and scheduling work assignments
- Ensuring adequate staffing levels
- Managing payroll and benefits
- Reducing absenteeism and tardiness
- Improving employee morale and productivity

Now, let's explore five ways to create an Excel employee absence schedule:
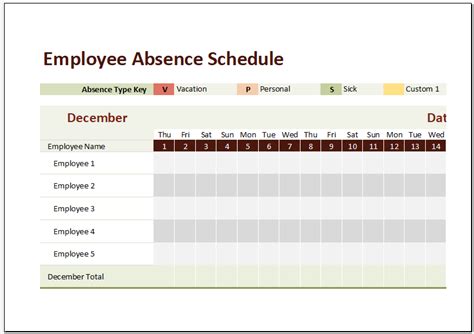
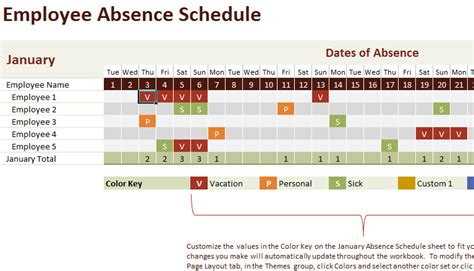
Method 1: Using Excel Templates
Excel offers various pre-built templates for creating an employee absence schedule. To access these templates, follow these steps:
- Open Excel and click on the "File" tab.
- Select "New" and then click on "Templates."
- In the search bar, type "employee absence schedule" or " attendance tracker."
- Choose a template that suits your needs and click "Download."
Benefits of Using Excel Templates
- Time-saving: Excel templates save you time and effort in creating an absence schedule from scratch.
- Easy to use: Pre-built templates are designed to be user-friendly, making it easy to input data and manage absences.
- Customizable: You can modify the template to suit your organization's specific needs.
Method 2: Creating a Custom Schedule from Scratch
If you prefer to create a custom schedule from scratch, follow these steps:
- Set up a new Excel spreadsheet with the following columns:
- Employee Name
- Date
- Absence Type (e.g., vacation, sick leave, etc.)
- Number of Absent Days
- Remaining Absent Days (if applicable)
- Format the columns and rows to create a clear and organized layout.
- Enter employee data and absence information.
- Use formulas to calculate the total number of absent days and remaining absent days.
Benefits of Creating a Custom Schedule
- Flexibility: A custom schedule allows you to tailor the layout and design to your organization's specific needs.
- Control: You have complete control over the data and formatting.
- Cost-effective: Creating a custom schedule from scratch can be a cost-effective solution.
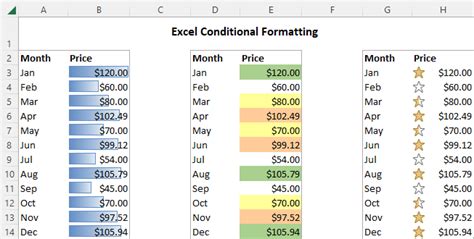
Method 3: Using Conditional Formatting
Conditional formatting can help you highlight important information and create a visually appealing absence schedule. To use conditional formatting:
- Select the data range that you want to format.
- Go to the "Home" tab and click on "Conditional Formatting."
- Choose a formatting rule, such as highlighting cells that contain specific text or values.
- Apply the formatting rule to the selected data range.
Benefits of Using Conditional Formatting
- Visual appeal: Conditional formatting can help create a visually appealing schedule that draws attention to important information.
- Easy to use: Conditional formatting is a user-friendly feature that can be applied quickly and easily.
- Customizable: You can create custom formatting rules to suit your organization's specific needs.
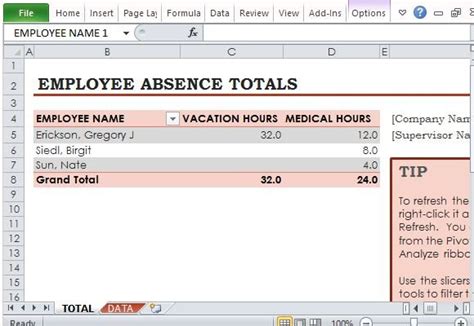
Method 4: Creating a PivotTable
A PivotTable can help you analyze and summarize employee absence data. To create a PivotTable:
- Select the data range that you want to analyze.
- Go to the "Insert" tab and click on "PivotTable."
- Choose a cell to place the PivotTable.
- Drag and drop fields to create a PivotTable that summarizes employee absence data.
Benefits of Using a PivotTable
- Data analysis: A PivotTable can help you analyze and summarize employee absence data quickly and easily.
- Customizable: You can create custom PivotTables to suit your organization's specific needs.
- Time-saving: PivotTables can save you time and effort in analyzing and summarizing data.
Method 5: Using Excel Add-ins
Excel add-ins can help you create a more efficient and effective employee absence schedule. Some popular add-ins include:
- Employee Absence Tracker
- Attendance Tracker
- Leave Management
To use an Excel add-in:
- Search for add-ins in the Excel store or online.
- Download and install the add-in.
- Follow the instructions to create an employee absence schedule using the add-in.

Benefits of Using Excel Add-ins
- Time-saving: Excel add-ins can save you time and effort in creating an employee absence schedule.
- Easy to use: Add-ins are designed to be user-friendly and easy to use.
- Customizable: You can customize the add-in to suit your organization's specific needs.
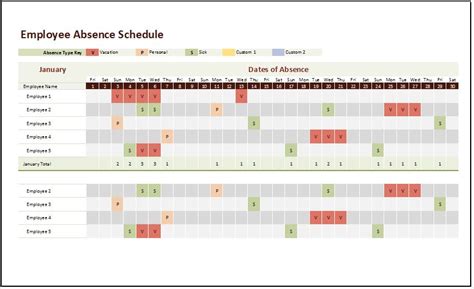
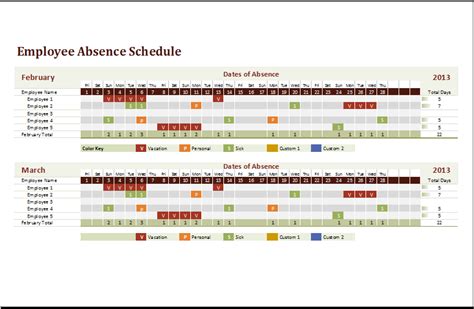
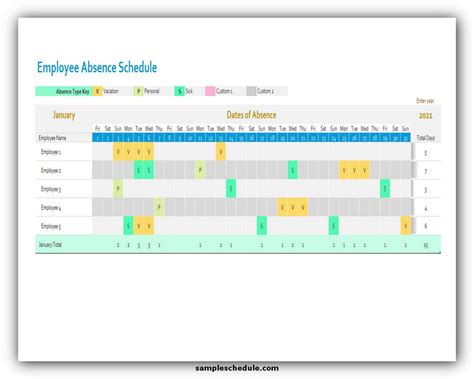
Gallery of Employee Absence Schedule Images
Employee Absence Schedule Image Gallery


We hope this article has provided you with valuable insights and practical tips on creating an Excel employee absence schedule. By implementing one of these methods, you can streamline your absence management process, reduce errors, and improve communication. Remember to customize your schedule to suit your organization's specific needs and take advantage of Excel's features and add-ins to make your schedule more efficient and effective.
Share your thoughts and experiences with creating an employee absence schedule in the comments below. Don't forget to share this article with your colleagues and friends who may find it helpful.