
Are you tired of manually entering "yes" or "no" in your Excel spreadsheets? Do you want to make your data entry process more efficient and reduce errors? Creating a yes/no drop-down list in Excel is a simple and effective way to achieve this. In this article, we will explore five different methods to create a yes/no drop-down list in Excel.
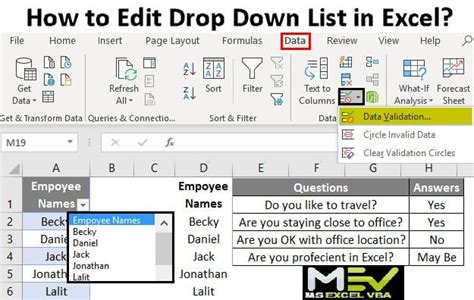
Method 1: Using Data Validation

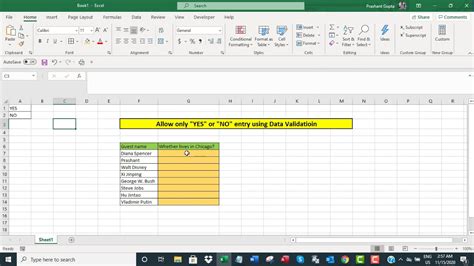
The first method is to use Excel's built-in data validation feature. This feature allows you to restrict the input values in a cell to a specific list.
- Select the cell where you want to create the drop-down list.
- Go to the "Data" tab in the ribbon.
- Click on "Data Validation" in the "Data Tools" group.
- In the "Data Validation" dialog box, select "List" from the "Allow" dropdown menu.
- In the "Source" field, enter the following formula:
= {"Yes","No"} - Click "OK" to apply the changes.
Now, when you select the cell, you will see a drop-down list with "Yes" and "No" options.
Method 2: Using a Table
Another way to create a yes/no drop-down list is to use a table. This method is useful when you want to use a drop-down list in multiple cells.
- Create a new table with two columns and two rows.
- Enter "Yes" in the first row of the first column and "No" in the second row.
- Select the cell where you want to create the drop-down list.
- Go to the "Data" tab in the ribbon.
- Click on "Data Validation" in the "Data Tools" group.
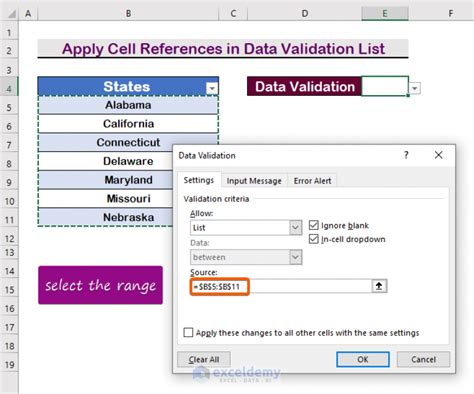
- In the "Data Validation" dialog box, select "List" from the "Allow" dropdown menu.
- In the "Source" field, select the range of cells that contains the "Yes" and "No" values.
- Click "OK" to apply the changes.
Now, when you select the cell, you will see a drop-down list with "Yes" and "No" options.
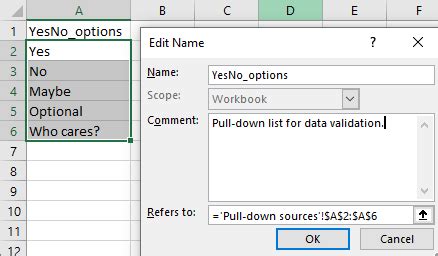
Method 3: Using a Named Range
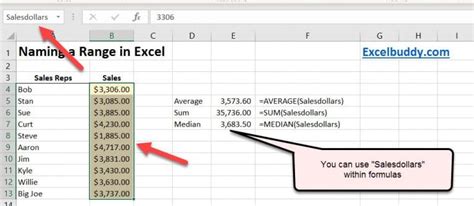
You can also create a yes/no drop-down list using a named range. This method is useful when you want to use a drop-down list in multiple worksheets.
- Select the cell that contains the "Yes" and "No" values.
- Go to the "Formulas" tab in the ribbon.
- Click on "Define Name" in the "Defined Names" group.
- In the "New Name" dialog box, enter a name for the range, such as "YesNo".
- Click "OK" to apply the changes.
- Select the cell where you want to create the drop-down list.
- Go to the "Data" tab in the ribbon.
- Click on "Data Validation" in the "Data Tools" group.
- In the "Data Validation" dialog box, select "List" from the "Allow" dropdown menu.
- In the "Source" field, enter the following formula:
=YesNo - Click "OK" to apply the changes.
Now, when you select the cell, you will see a drop-down list with "Yes" and "No" options.
Method 4: Using VBA
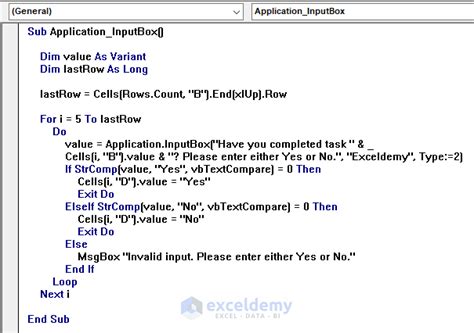
If you want to create a yes/no drop-down list programmatically, you can use VBA. This method is useful when you want to automate the process of creating drop-down lists.
- Open the Visual Basic Editor by pressing "Alt + F11" or by navigating to "Developer" > "Visual Basic" in the ribbon.
- In the Visual Basic Editor, insert a new module by clicking "Insert" > "Module".
- In the module, enter the following code:
Sub CreateYesNoDropDown()
    Dim cell As Range
    Set cell = Selection
    With cell.Validation
       .Delete
       .Add Type:=xlValidateList, AlertStyle:=xlValidAlertStop, Operator:=xlEqual, Formula1:="Yes,No"
       .IgnoreBlank = True
       .InCellDropdown = True
       .InputTitle = ""
       .ErrorTitle = ""
       .InputMessage = ""
       .ErrorMessage = ""
       .ShowInput = True
       .ShowError = True
    End With
End Sub
- Click "Run" > "Run Sub/UserForm" to execute the code.
- Select the cell where you want to create the drop-down list.
- Press "Alt + F8" to run the macro.
Now, when you select the cell, you will see a drop-down list with "Yes" and "No" options.
Method 5: Using Power Query
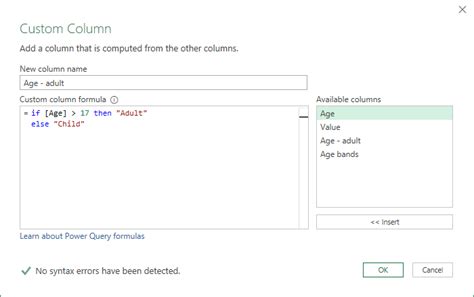
Finally, you can create a yes/no drop-down list using Power Query. This method is useful when you want to create a drop-down list based on a table or query.
- Select the cell where you want to create the drop-down list.
- Go to the "Data" tab in the ribbon.
- Click on "New Query" in the "Get & Transform Data" group.
- In the "Query Editor", create a new table with two columns and two rows.
- Enter "Yes" in the first row of the first column and "No" in the second row.
- Click "Close & Load" to load the query into the worksheet.
- Select the cell where you want to create the drop-down list.
- Go to the "Data" tab in the ribbon.
- Click on "Data Validation" in the "Data Tools" group.
- In the "Data Validation" dialog box, select "List" from the "Allow" dropdown menu.
- In the "Source" field, select the range of cells that contains the "Yes" and "No" values.
- Click "OK" to apply the changes.
Now, when you select the cell, you will see a drop-down list with "Yes" and "No" options.
Yes No Drop Down Image Gallery

We hope this article has helped you learn how to create a yes/no drop-down list in Excel. Whether you use data validation, a table, a named range, VBA, or Power Query, creating a drop-down list can make your data entry process more efficient and reduce errors. Do you have any questions or need further assistance? Please leave a comment below!