
As one of the most popular spreadsheet software, Microsoft Excel is widely used for data analysis, visualization, and presentation. When it comes to creating graphs on Excel Mac, many users find it challenging. However, with the right guidance, you can easily create stunning graphs to represent your data. In this article, we will explore five easy ways to make a graph on Excel Mac.
Creating graphs on Excel Mac is an essential skill for anyone working with data. Graphs help to visualize complex data, making it easier to understand and interpret. With Excel, you can create a variety of graphs, including column charts, line charts, pie charts, and more.
Whether you're a student, a business professional, or a researcher, learning how to create graphs on Excel Mac can help you to communicate your data more effectively. In this article, we will cover the basics of creating graphs on Excel Mac and provide step-by-step instructions for five easy ways to get started.
Why Create Graphs on Excel Mac?
Before we dive into the methods, let's explore why creating graphs on Excel Mac is important. Graphs are a powerful tool for data visualization, allowing you to:
- Communicate complex data in a simple and concise manner
- Identify trends and patterns in your data
- Make informed decisions based on data insights
- Create engaging and interactive presentations
Now, let's move on to the five easy ways to make a graph on Excel Mac.
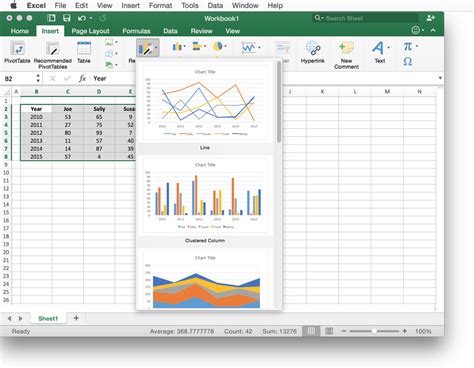
Method 1: Using the Recommended Charts Feature
One of the easiest ways to create a graph on Excel Mac is to use the Recommended Charts feature. This feature allows you to create a graph in just a few clicks.
To use the Recommended Charts feature, follow these steps:
- Select the data range you want to graph.
- Go to the "Insert" tab in the ribbon.
- Click on the "Recommended Charts" button.
- Select the type of graph you want to create from the recommended options.
- Click "OK" to create the graph.
Method 2: Using the Chart Wizard
Step-by-Step Instructions
Another way to create a graph on Excel Mac is to use the Chart Wizard. This feature provides a step-by-step guide to creating a graph.
To use the Chart Wizard, follow these steps:
- Select the data range you want to graph.
- Go to the "Insert" tab in the ribbon.
- Click on the "Chart Wizard" button.
- Select the type of graph you want to create.
- Choose the data series and axis options.
- Customize the graph as desired.
- Click "Finish" to create the graph.
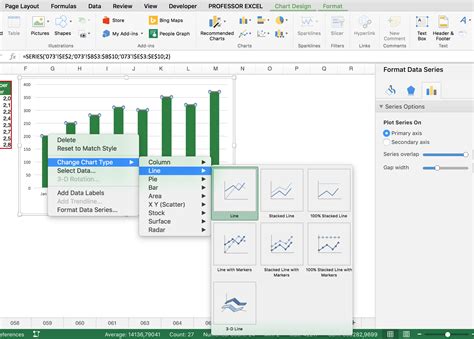
Method 3: Creating a Graph from Scratch
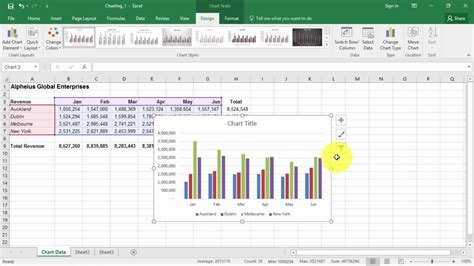
If you want more control over your graph, you can create it from scratch. This method requires more effort, but it allows you to customize every aspect of your graph.
To create a graph from scratch, follow these steps:
- Select the data range you want to graph.
- Go to the "Insert" tab in the ribbon.
- Click on the "Chart" button.
- Select the type of graph you want to create.
- Customize the graph as desired, including the data series, axis options, and formatting.
- Click "OK" to create the graph.
Method 4: Using a Template
Benefits of Using a Template
Using a template is another easy way to create a graph on Excel Mac. Templates provide a pre-designed graph that you can customize to suit your needs.
To use a template, follow these steps:
- Select the data range you want to graph.
- Go to the "File" tab in the ribbon.
- Click on "New from Template".
- Select the graph template you want to use.
- Customize the graph as desired.
- Click "OK" to create the graph.
Method 5: Recording a Macro
If you want to automate the graph creation process, you can record a macro. This method allows you to create a graph with a single click.
To record a macro, follow these steps:
- Select the data range you want to graph.
- Go to the "Developer" tab in the ribbon.
- Click on the "Record Macro" button.
- Record the steps to create the graph.
- Save the macro.
- Run the macro to create the graph.
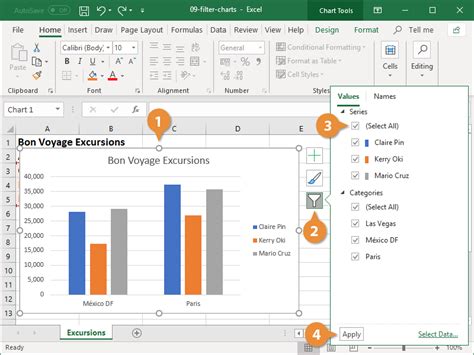
Tips and Tricks
- Use the "Format" tab to customize the appearance of your graph.
- Use the "Data" tab to adjust the data series and axis options.
- Use the "Chart Tools" tab to customize the graph's layout and design.
- Experiment with different graph types and templates to find the best fit for your data.
Gallery of Excel Mac Graphs
Excel Mac Graph Image Gallery


Final Thoughts
Creating graphs on Excel Mac is easier than you think. With these five easy methods, you can create stunning graphs to represent your data. Whether you're a beginner or an advanced user, these methods will help you to communicate your data more effectively. Remember to experiment with different graph types and templates to find the best fit for your data. Happy graphing!
What's Next?
If you have any questions or need further assistance, please leave a comment below. We'd love to hear from you!