Converting datetime to date in Excel is a common task that can be tricky for many users. Datetime values in Excel often appear as a combination of date and time, but sometimes you only need the date part. Whether you're working with financial data, schedules, or any other type of information that requires date manipulation, knowing how to convert datetime to date in Excel is an essential skill.
In this article, we'll explore the different methods to convert datetime to date in Excel, including formulas, functions, and shortcuts. We'll also discuss the common challenges and errors that occur during the conversion process and provide tips on how to overcome them.
Why Convert Datetime to Date in Excel?
Before we dive into the methods, let's quickly discuss why you might need to convert datetime to date in Excel. Here are a few reasons:
- Data analysis: When working with datetime values, it's often necessary to focus on the date part only. For example, if you're analyzing sales data by date, you might want to ignore the time component.
- Reporting: In many reports, you only need to show the date, not the time. Converting datetime to date helps you to simplify the data and make it more readable.
- Data manipulation: When performing calculations or data manipulation, you might need to work with dates only. Converting datetime to date ensures that you're working with the correct data type.
Method 1: Using the INT Function
One of the simplest ways to convert datetime to date in Excel is by using the INT function. This function truncates the decimal part of the datetime value, leaving you with the date part only.
Formula: =INT(A1)
Where A1 is the cell containing the datetime value.
How it works: The INT function converts the datetime value to a serial number, which is then truncated to remove the decimal part. The resulting value is the date part only.
Method 2: Using the FLOOR Function
Another method to convert datetime to date in Excel is by using the FLOOR function. This function rounds down the datetime value to the nearest integer, effectively removing the time component.
Formula: =FLOOR(A1,1)
Where A1 is the cell containing the datetime value.
How it works: The FLOOR function rounds down the datetime value to the nearest integer, which is the date part only.
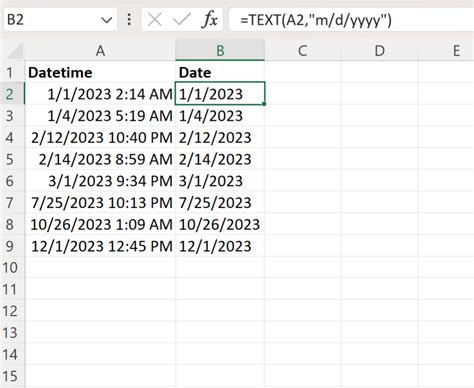
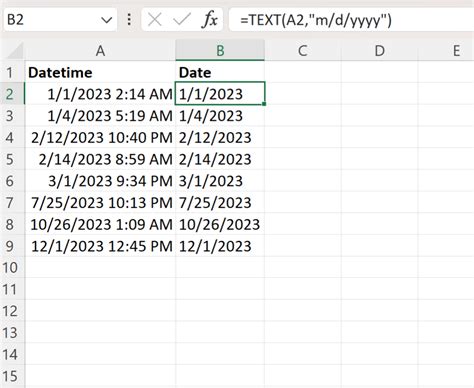
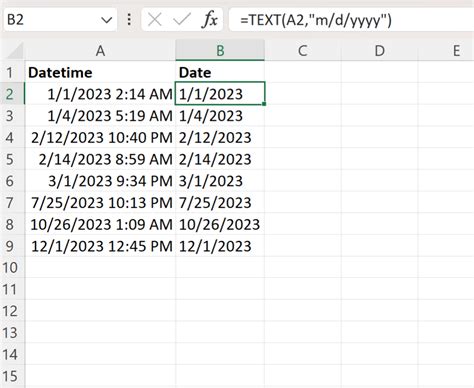
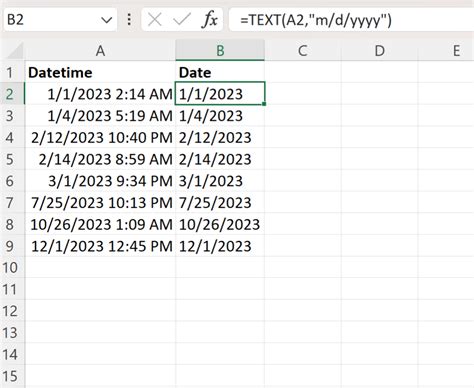
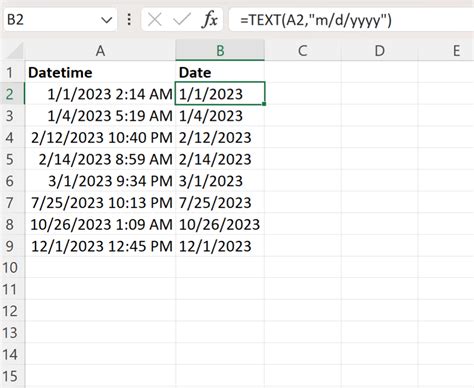
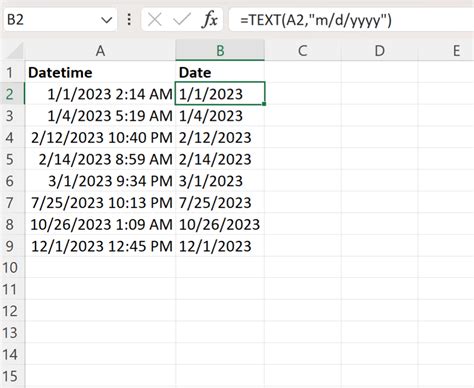
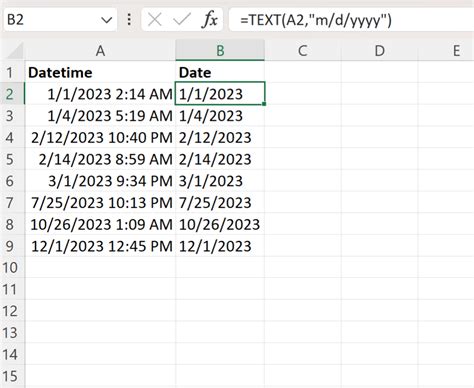
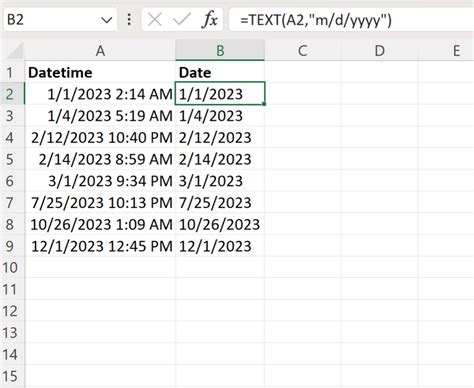
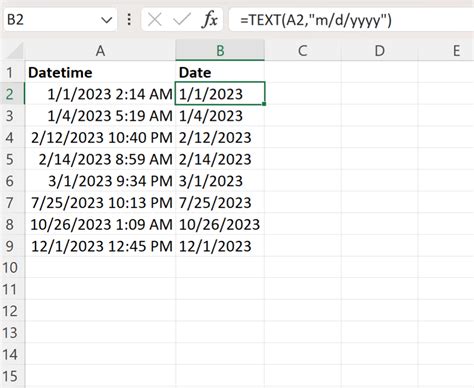
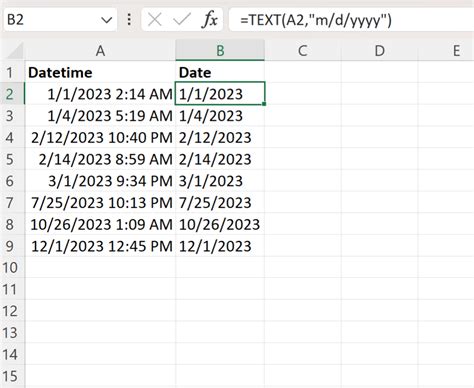
Method 3: Using the TEXT Function
If you want to format the date part as text, you can use the TEXT function. This function converts the datetime value to a text string in the format you specify.
Formula: =TEXT(A1,"yyyy-mm-dd")
Where A1 is the cell containing the datetime value.
How it works: The TEXT function converts the datetime value to a text string in the format specified in the second argument.
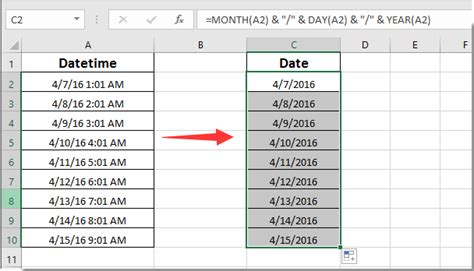
Method 4: Using the DATE Function
If you want to extract the date part from a datetime value and still work with it as a date, you can use the DATE function. This function creates a new date value from the year, month, and day components of the original datetime value.
Formula: =DATE(YEAR(A1),MONTH(A1),DAY(A1))
Where A1 is the cell containing the datetime value.
How it works: The DATE function creates a new date value using the year, month, and day components of the original datetime value.
Method 5: Using Power Query
If you're working with large datasets or want to perform more complex data manipulation, you can use Power Query to convert datetime to date in Excel. Power Query is a powerful data manipulation tool that allows you to transform and shape your data with ease.
Formula: = Date.From DateTime.From(A1)
Where A1 is the cell containing the datetime value.
How it works: The Date.From function converts the datetime value to a date value, effectively removing the time component.
Common Challenges and Errors
When converting datetime to date in Excel, you might encounter some common challenges and errors. Here are a few:
- Time zone issues: If your datetime values are in a different time zone, you might need to adjust the conversion method to account for the time zone difference.
- Formatting issues: If your datetime values are formatted differently, you might need to adjust the conversion method to account for the formatting differences.
- Leap year issues: If your datetime values span leap years, you might need to adjust the conversion method to account for the extra day.
Tips and Best Practices
Here are some tips and best practices to keep in mind when converting datetime to date in Excel:
- Use the correct function: Choose the correct function based on your needs. If you want to format the date part as text, use the TEXT function. If you want to extract the date part and still work with it as a date, use the DATE function.
- Adjust for time zone differences: If your datetime values are in a different time zone, adjust the conversion method to account for the time zone difference.
- Test your results: Always test your results to ensure that the conversion was successful.
Conclusion
Converting datetime to date in Excel is a common task that can be achieved using various methods. By understanding the different methods and tips outlined in this article, you can easily convert datetime to date in Excel and make your data manipulation tasks more efficient. Remember to choose the correct function based on your needs and adjust for time zone differences and formatting issues. Happy converting!
Gallery of Converting Datetime to Date in Excel:
Converting Datetime to Date in Excel Image Gallery
We hope you found this article helpful! If you have any questions or need further assistance, please don't hesitate to ask.
